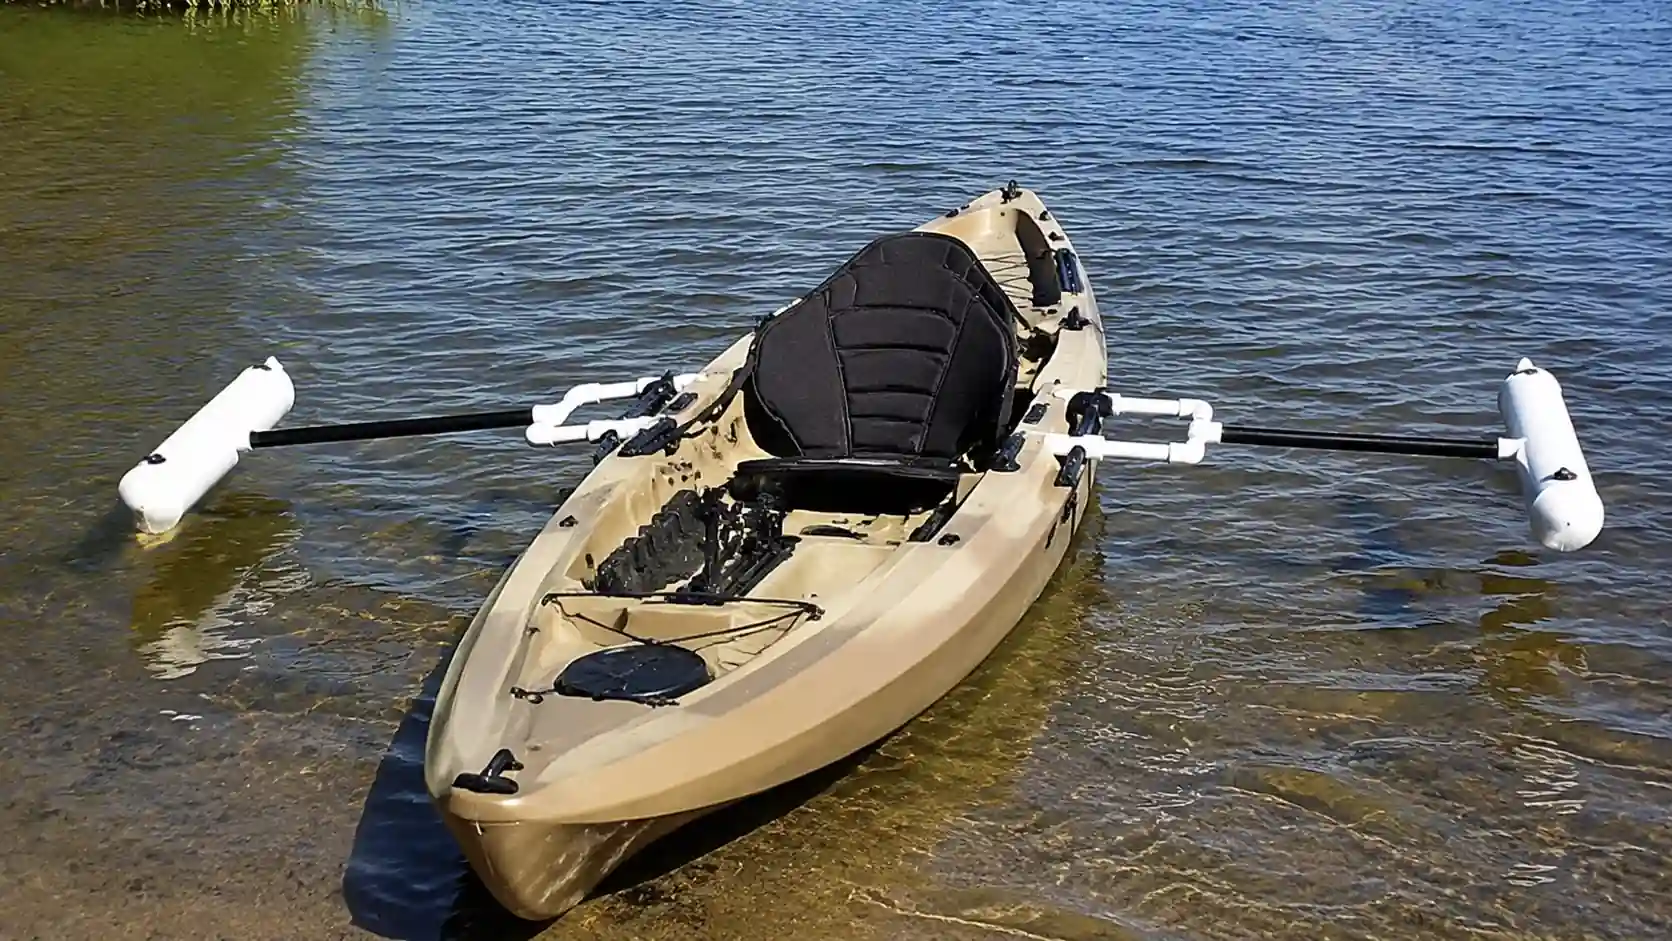
DIY kayak outriggers are homemade stabilizer arms that attach to a kayak to add width and balance.
Anglers, beginners, and anyone who likes standing up while fishing often build their own set rather than buying a store-bought model.
Most builds use PVC pipe, foam floats, or crab pot buoys mounted on rod holder arms.
The extra floats widen the base of the kayak and cut the wobble that makes new paddlers nervous.
Real kayakers who tested homemade rigs online report mixed results. Some say the stability changed how they fish and stand.
Others found their build added drag or shifted out of line in rough water.
What are DIY Kayak Outriggers?
DIY kayak outriggers are floats mounted on arms that stick out from each side of a kayak.
They act like training wheels, adding width so the boat resists tipping.
Most home builds use PVC pipe with foam noodles, sealed pool floats, or crab pot buoys on the ends.
Wider support means a steadier base, so standing, casting, or reaching for gear feels less risky.
That trade-off is why anglers and beginners are the biggest fans of outriggers.
Anglers want to stand and cast without rocking the kayak. Beginners want fewer close calls while they learn balance.
Both groups get the same payoff: a boat that feels planted, which builds confidence before ever leaving the dock.
Types of DIY Kayak Outriggers
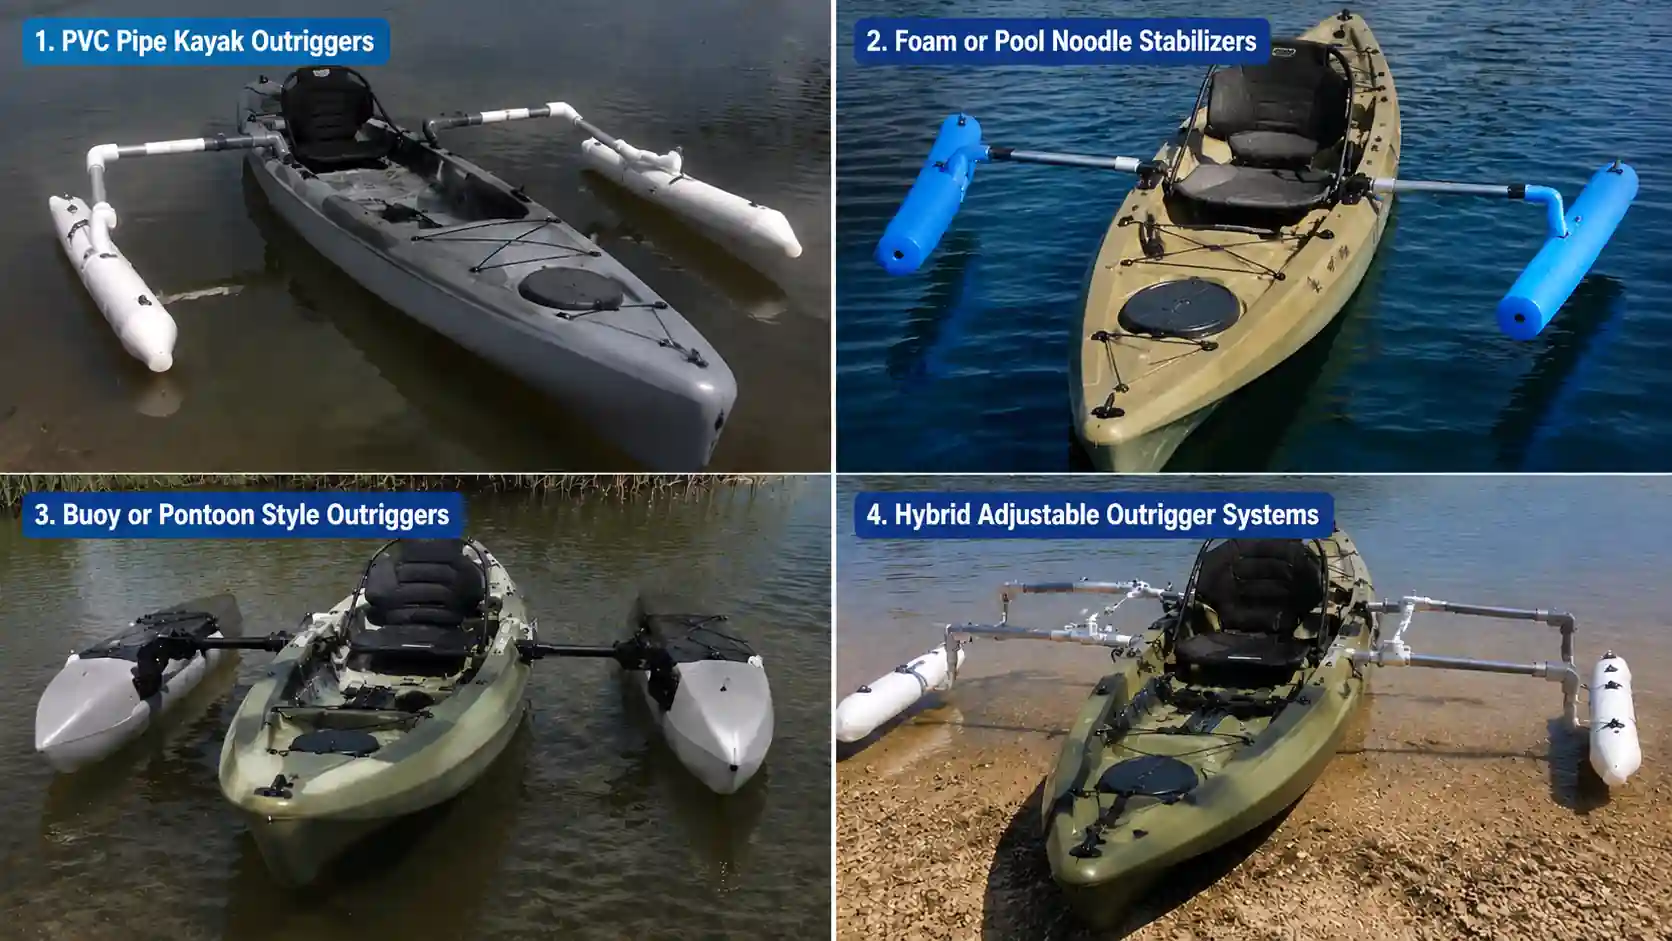
Homemade outriggers come in a few common styles, each suited to a different budget and skill level. Here is a look at the main builds paddlers use.
1. PVC Pipe Kayak Outriggers
This is the most common build among home builders, and for good reason. PVC pipe is cheap, light, and easy to cut with basic hand tools.
Most kits pair pipe arms with rod holder mounts, so no drilling into the hull is needed.
Beginners tend to start here since parts are simple to find at any hardware store and mistakes are cheap to fix.
2. Foam or Pool Noodle Stabilizers
These use foam floats or pool noodles instead of sealed buoys, making them the lightest option on this list.
They cost very little and go together quickly, but the foam wears down faster than harder materials do.
They hold up fine on ponds and calm lakes, but are not built for rough chop or long trips in open water.
3. Buoy or Pontoon Style Outriggers
Crab pot buoys or small pontoons give more lift than foam, which suits anglers who want to stand while casting or reeling in fish.
This style borrows from real fishing kayak rigs used by guides and tournament anglers.
The added buoyancy makes standing feel steadier, though the setup weighs more than a basic PVC build.
4. Hybrid Adjustable Outrigger Systems
These combine PVC arms with adjustable rod holder mounts, letting paddlers swing the outriggers up out of the water or fold them flat for transport.
It is a step up in build time and cost, but it gives the most flexible setup.
Paddlers who switch between calm water fishing and faster paddling tend to prefer this style.
Picking a style comes down to budget, water conditions, and how you plan to use your kayak.
Real User Experience on DIY Outriggers
Paddlers who built their own outriggers say the balance gains are real, though they rarely match those of a commercial system built with matched, tested parts.
On fishing forums like Bass Resource, builders report good results on calm lakes and ponds, where the added floats keep the boats from rocking and let them stand to cast.
The same threads mention trade-offs. Extra width can slow paddling and make the kayak harder to turn.
A few users found that float arms got in the way of paddle strokes until they moved the mounting point further back.
The general take from these communities is that outriggers help most in calm, flat water and in fishing setups, and matter less once waves or current pick up.
Materials Needed for Kayak OutriggerMake sure you have these materials before starting:
|
How to Build DIY Kayak Outriggers?
Once you have your parts, the build takes just a few steps. Go slow and check fit before gluing or drilling.
Step 1: Measure Your Kayak Width
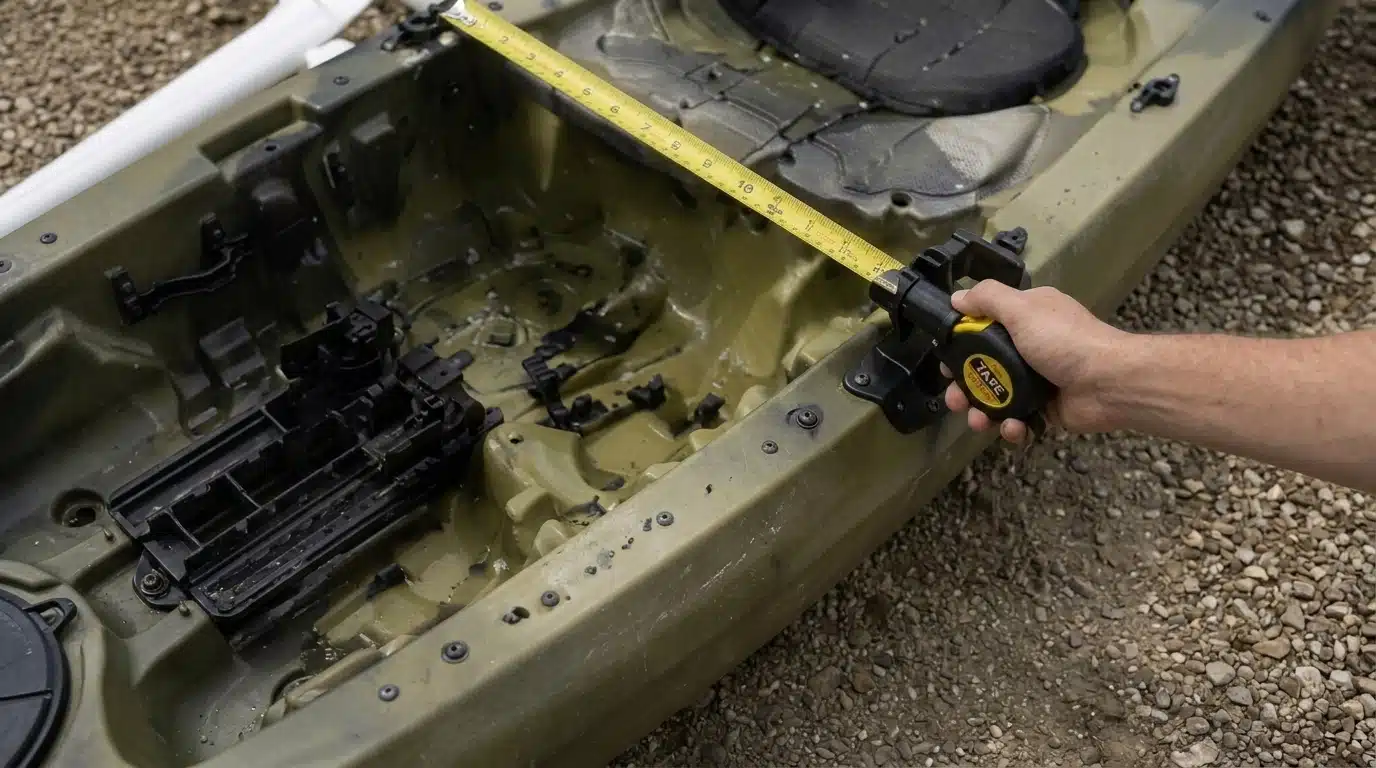
Measure the widest point of your kayak and mark where you plan to mount the rod holders, usually just behind the seat.
Getting this measurement right keeps both arms level and even on each side.
Pro tip: Mark both sides at once so measurements stay identical.
Step 2: Cut and Prepare Support Arms
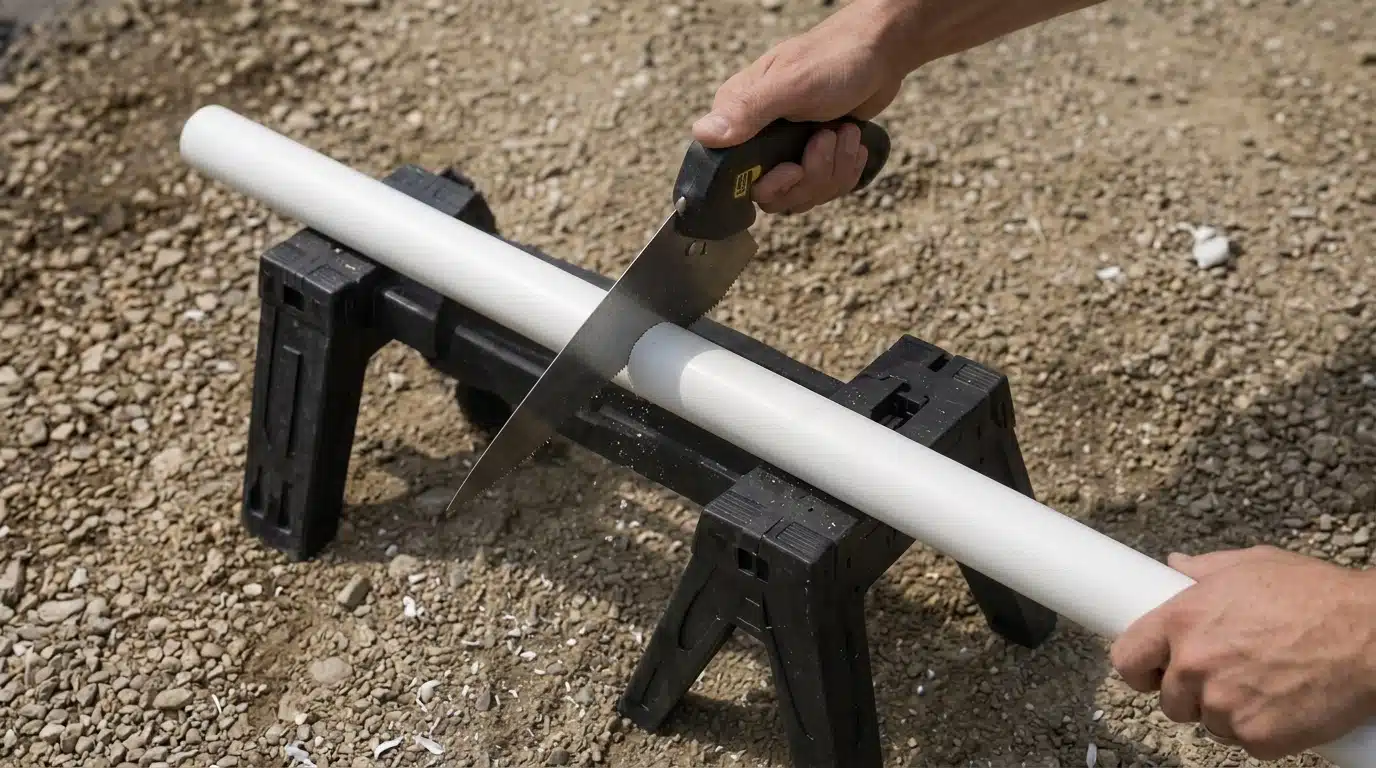
Cut your PVC or aluminum arms to matching lengths using a saw or pipe cutter.
Sand down any rough edges so they fit cleanly into joints and rod holder mounts without snagging or cracking later.
Pro tip: Cut both arms together for a perfect matching length.
Step 3: Attach Flotation Devices Securely
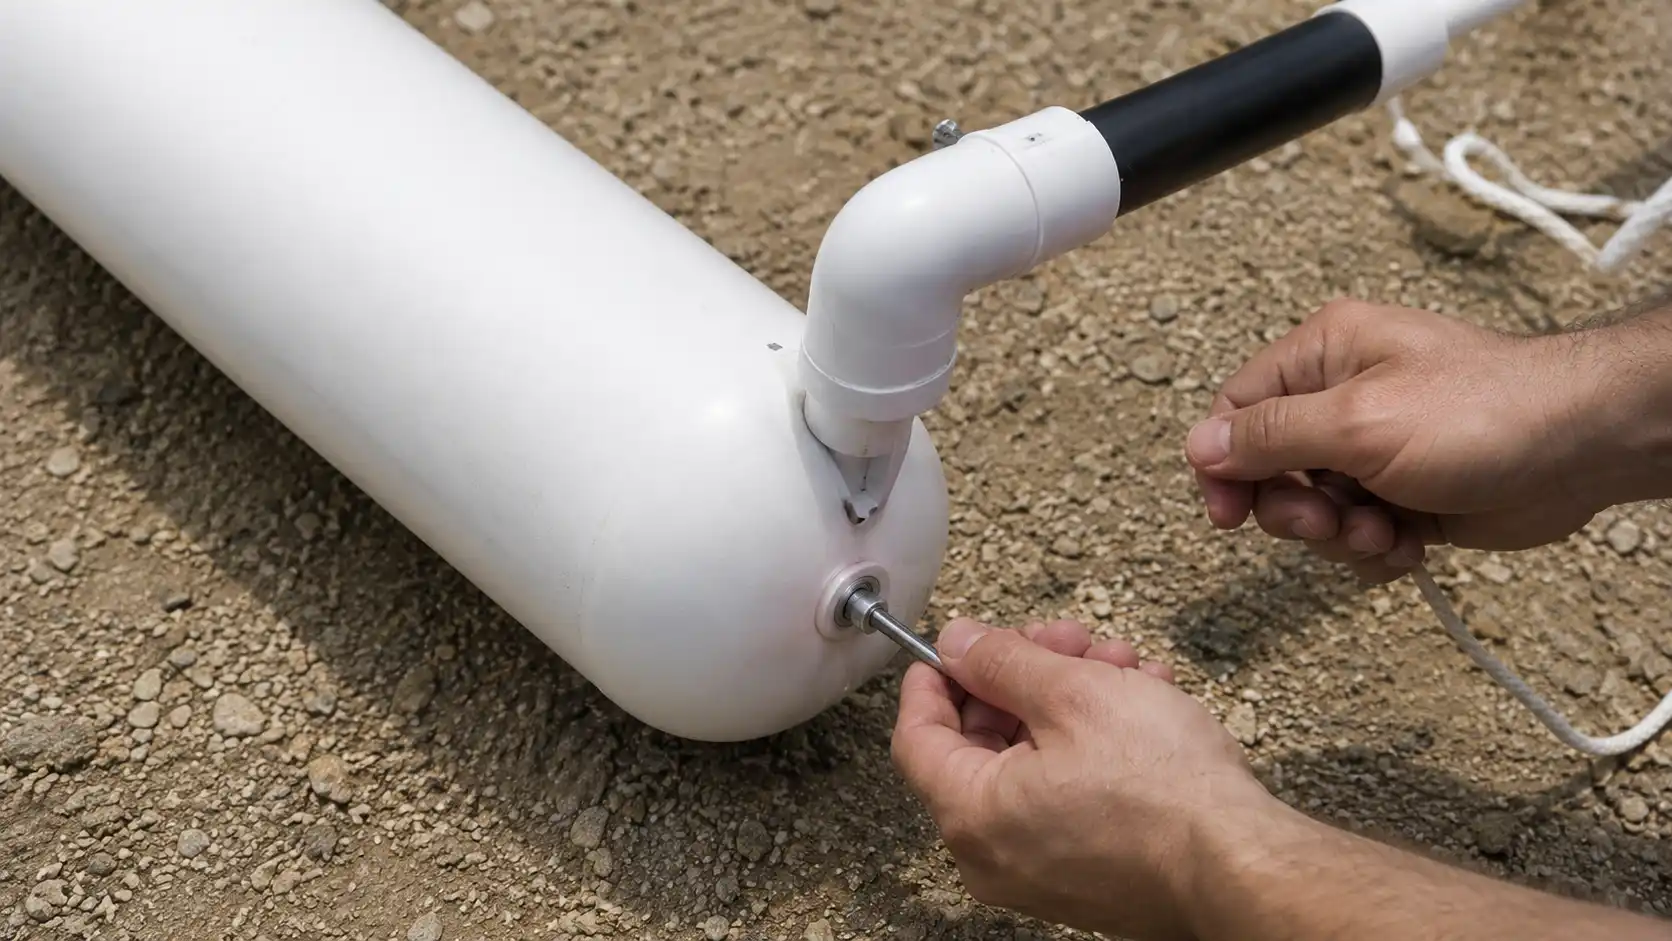
Glue or bolt your foam floats, buoys, or pontoons onto the ends of your arms.
Use waterproof adhesive on any PVC joints and let it fully cure before proceeding with mounting.
Pro tip: Let glued joints cure overnight before any load testing.
Step 4: Mount Outriggers to Kayak Frame
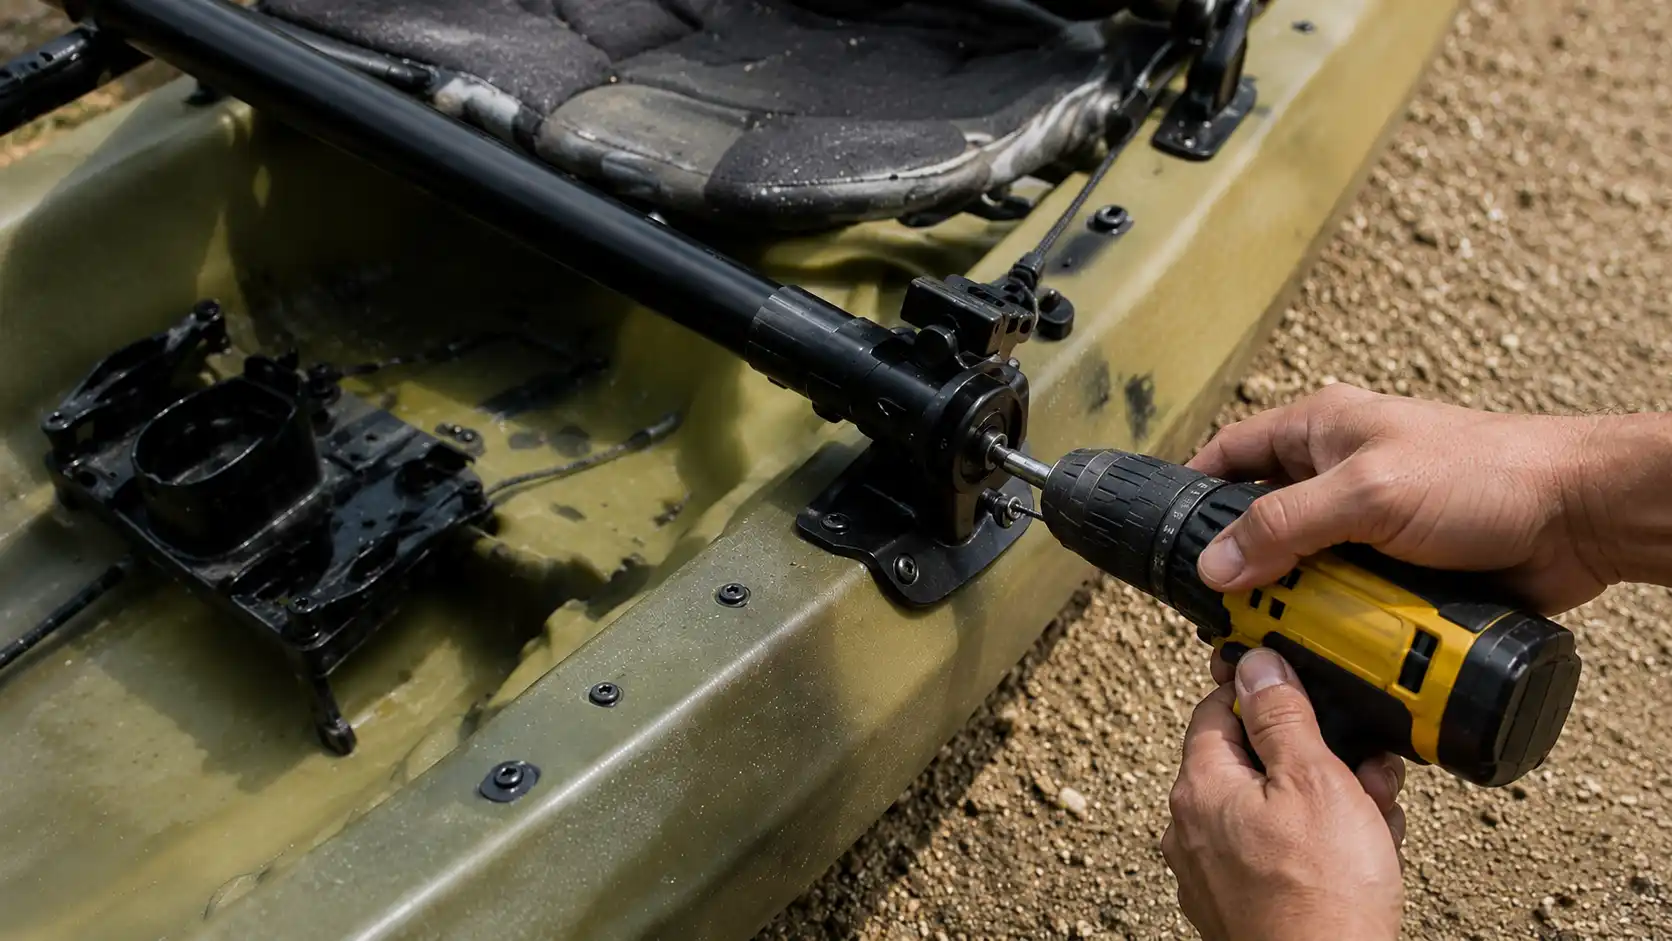
Clamp the finished arms into your rod holders or mounting brackets, keeping both sides level and parallel to the kayak.
Drill and bolt through the rod holder tubes for a tighter, more secure hold.
Pro tip: Double-check both arms sit at matching angles before drilling.
Step 5: Test Stability in Calm Water First
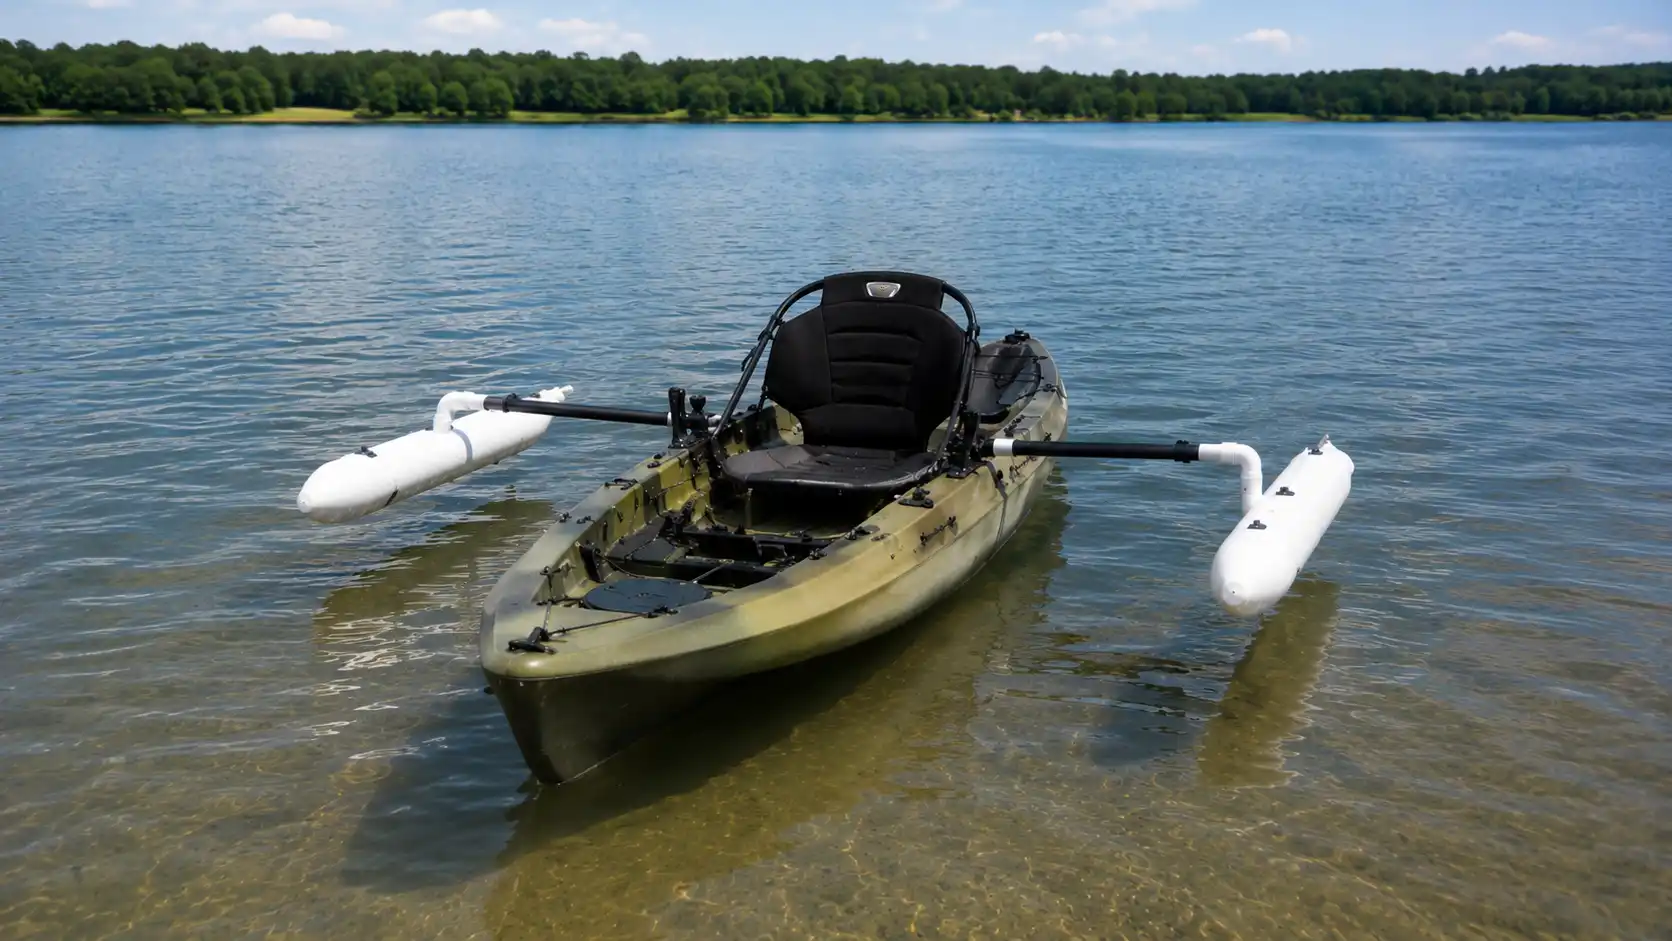
Launch in a calm, shallow area before any open water trip. Shift your weight side to side and check that both floats sit level and the mounts hold firm under light pressure.
Paddle a short loop near shore to see how the extra width affects turning and speed before trusting it further out.
Pro tip: Test near shore so you can adjust quickly if needed.
Careful measuring and testing up front is what makes a build trustworthy in open water.
A few extra minutes at the dock can save a much longer swim back to shore.
Best Mounting Methods
Rail mount systems attach to the kayak’s existing track rails, so no new holes are needed, and the arms can slide to adjust.
Clamp-on rod holders are the most common choice for home builds because they grip existing rod-holder tubes without extra hardware.
Strap-based mounts work well for a removable setup, though they can shift under load.
Permanently drilled mounts provide the strongest hold, but the holes remain in the hull, so this option suits paddlers who plan to keep outriggers in the long term.
Whatever mount you pick, keep both arms symmetrical and evenly loaded, since uneven weight is one of the fastest ways to throw off your kayak’s balance.
Common Kayak Outrigger Mistakes
A few build errors recur in homemade setups. Watch for these before heading out on the water.
- Float sits too high above the waterline: it will not touch the water until the kayak tips too far to recover.
- Uneven left-right balance: mismatched arm length or float size cancels out the stability you built.
- Weak bolt or clamp failure: cheap hardware works loose fast under repeated paddle strokes.
- Overly heavy design: too much weight on the arms slows paddling speed and tires you out.
- Skipping test runs: launching in open water without a calm water test first invites bigger problems.
Catching these early during a test run saves a repair trip later.
How Much Stability You Actually Gain
A wider base from the outriggers reduces the risk of tipping by giving the kayak greater resistance to rocking side to side.
That extra width lets anglers stand up to cast or reel in a catch without white-knuckling the sides.
It also helps with re-entry after a swim, since the floats give you something to push against as you climb back on.
The trade-off shows up in speed and tracking, since wider setups create more drag and can make the kayak harder to paddle straight.
In short, outriggers trade some speed and maneuverability for a steadier ride, a fair swap for fishing trips and calm water paddling, but less useful for anyone chasing distance or speed.
Cost Breakdown: DIY vs Store-Bought
Building your own costs far less than buying a finished system, though you give up some polish and warranty support.
| Option | Typical Cost | Trade Off |
|---|---|---|
| DIY build | $20 to $100 | Cheaper, fully customizable |
| Commercial stabilizer | $50 to $220 | Higher cost, more durable |
A DIY build costs less and suits most home projects, while a commercial system suits paddlers who want tested durability.
Note: Prices above are general estimates and can vary by region, retailer, and material choice, so confirm current costs before buying.
Safety Tips Kayak Outriggers Users
A homemade rig is only as safe as the checks you run before launch. Keep these points in mind every time you head out.
- Test in shallow, calm water first: confirm the build holds before any real trip.
- Check bolts and joints before every trip: loose hardware fails fastest under repeated use.
- Avoid offshore use with weak builds: rough water exposes any hidden weak point fast.
- Wear a PFD even with added stability: outriggers reduce the risk of tipping but do not eliminate it, so wearing a PFD is very important.
- Do not overload the kayak: any extra weight beyond its rated weight limit cancels out any stability gains.
A few minutes of checks before launch can prevent a much bigger problem later.
Treat every outing as a chance to double-check your build before fully trusting it.
Should You Build Outriggers or Buy One?
The right choice depends on your skill level, budget, and how you use your kayak.
Building your own makes sense if you are still learning, working with a tight budget, or want a setup shaped around your exact boat.
It is a good way to test whether outriggers even suit your paddling style before spending more.
Buying a commercial system makes more sense for ocean use, heavier fishing rigs, or anyone who wants tested, matched parts without the trial and error of a home build.
Neither option is wrong. It comes down to whether savings and custom fit matter more to you than ready-made durability and consistent performance.
Final Thoughts
DIY kayak outriggers give paddlers an affordable way to add stability without buying a full commercial system.
A basic PVC build costs a fraction of the cost of a store-bought rig and can be shaped around your kayak and paddling style.
Real kayakers report solid results in calm water and fishing setups, with the biggest trade-off being some added drag and reduced speed.
If you are new to kayaking, fish often from your boat, or just want more confidence on the water, a homemade outrigger set is worth the weekend it takes to build.
Start with a simple PVC design, test it in calm water, and adjust from there. A steadier kayak makes every trip out more enjoyable.
Frequently Asked Questions
How Long Should DIY Kayak Outriggers Be?
Most DIY outrigger arms extend 30 to 36 inches beyond the kayak’s side, placed roughly three-quarters of the way back toward the stern, just behind the seat.
How Far Should Outrigger Floats Sit From The Kayak?
Float placement depends on the kayak’s width and the length of the outrigger arms rather than a fixed distance. Closer floats reduce stability, while floats set too far out add drag, so most builders adjust their placement during the calm-water test run.
Can DIY Kayak Outriggers Be Removed When Not Needed?
Yes, most builds using clamp-on rod holders or strap mounts can be removed in minutes, letting you paddle without outriggers when speed matters more.