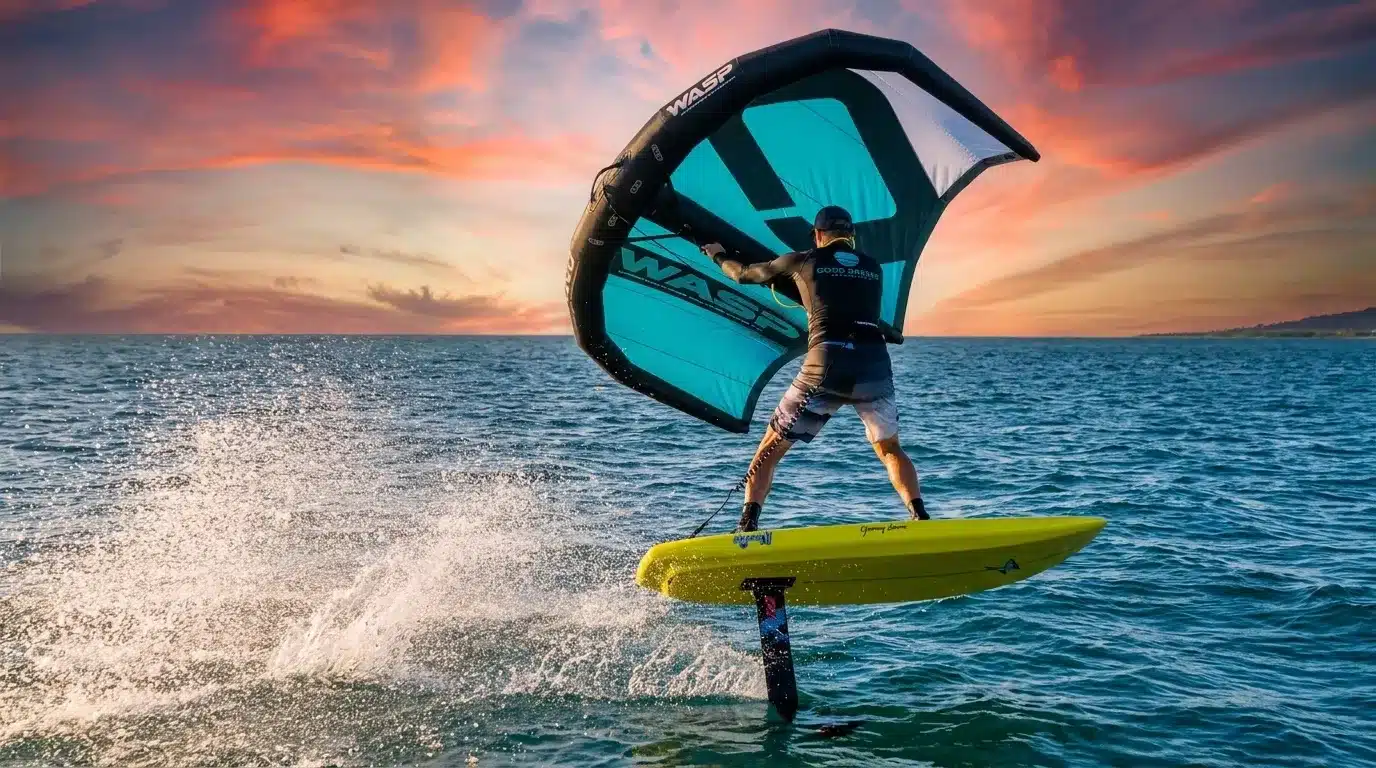
If you’ve seen someone gliding across the water holding an inflatable wing and wondered what it is, you’re looking at wing surfing, one of the fastest-growing wind sports right now.
So, what is wing surfing, and why is it suddenly everywhere? It’s a simpler, more accessible alternative to sports like windsurfing and kitesurfing, with a shorter learning curve and less complicated gear.
Wing surfing looks simple from the shore. Grab a wing, stand on a board, let the wind do the work. But there is a little more to it than that. Here is everything you need to know before you get started.
What is Wing Surfing and How Does it Work
Wing surfing is a water sport where you stand on a board and hold an inflatable handheld wing that catches the wind and pulls you across the water.
It’s one of the fastest-growing wind sports right now, thanks to its simple setup and a shorter learning curve than traditional alternatives.
The setup is simple:
- A board (similar to a paddleboard for beginners)
- An inflatable wing you hold with your hands
- Wind as your power source
You control movement by adjusting the angle of the wing and shifting your body weight. Unlike windsurfing, nothing is attached to the board, which gives you more freedom and makes it easier to manage as a beginner.
When riding:
- The wing generates forward pull from the wind
- You stay balanced on the board
- Direction comes from weight shifts and wing positioning
- Speed is controlled by angling or depowering the wing
Most beginners struggle with balance first; once that improves, control comes quickly.
Wing Surfing vs Wing Foiling vs Windsurfing
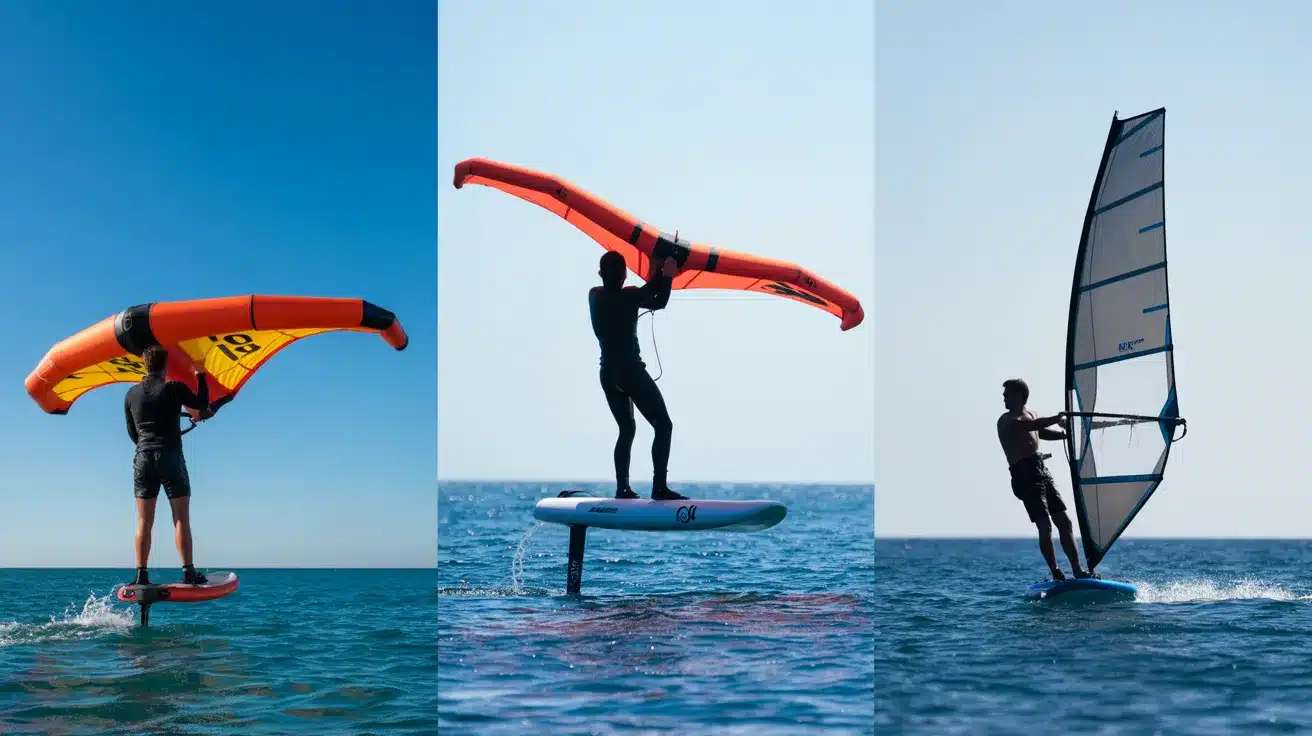
At first glance, these sports look similar, but the experience and learning curve are completely different. Understanding the key differences helps you choose the right one, rather than wasting time on the wrong setup.
- Wing Surfing: It’s ideal for beginners who want a simple setup and a faster learning curve. The board stays on the water, making it more stable and easier to control.
- Wing Foiling: Same handheld wing, but the board has a hydrofoil attached underneath. As you pick up speed, the foil lifts the board out of the water. You are literally flying a few feet above the surface. It is more exciting but also harder to learn. It takes more balance and skill.
- Windsurfing: It’s an older sport with a heavier setup and a steeper learning curve. You should also know how it compares to other wind sports like kitesurfing before deciding.
Quick Comparison Table
If you just want a fast side-by-side breakdown, this table highlights the key differences in difficulty, setup, and learning time.
| Wing Surfing | Wing Foiling | Windsurfing | |
|---|---|---|---|
| Difficulty | Beginner-friendly | Intermediate–Advanced | Intermediate |
| Equipment | Wing + flat board | Wing + foil board | Board + attached sail |
| Speed | Moderate | Fast | Fast |
| Learning Time | Days to weeks | Weeks to months | Weeks to months |
| Minimum Wind | 10–12 knots | 12–15 knots | 8–10 knots |
Which One Should You Choose?
- If you’re starting from scratch, go with wing-surfing.
- If you want more speed and long-term progression, move into wing foiling later.
- If you prefer a traditional setup with a fixed sail, windsurfing is a better fit.
Wing surfing is basically the easiest entry point into wind-powered water sports right now.
Is Wing Surfing Easy to Learn?
Wing surfing is relatively easy to get started with compared to other wind sports, but it is not effortless. Most beginners can stand and move within a few sessions, especially in steady wind and calm water.
The main challenge is balance and coordination, not power. Once you get comfortable handling the wing and staying stable on the board, progress tends to come quickly.
Here is a rough timeline of what to expect:
- Session 1 to 2: You get a feel for the wing on land and start moving on the water. Expect a lot of falling in.
- Session 3 to 5: You start riding in a straight line and controlling your speed with the wing.
- Week 2 to 3: Basic turns start to click, and you feel more comfortable in the water overall.
- Week 4 onwards: You are riding with confidence and can start thinking about more advanced moves or transitioning to a smaller board.
It is a short learning curve, but you still have to put in a few real sessions to feel in control.
Wing Surfing Equipment (What You Actually Need)
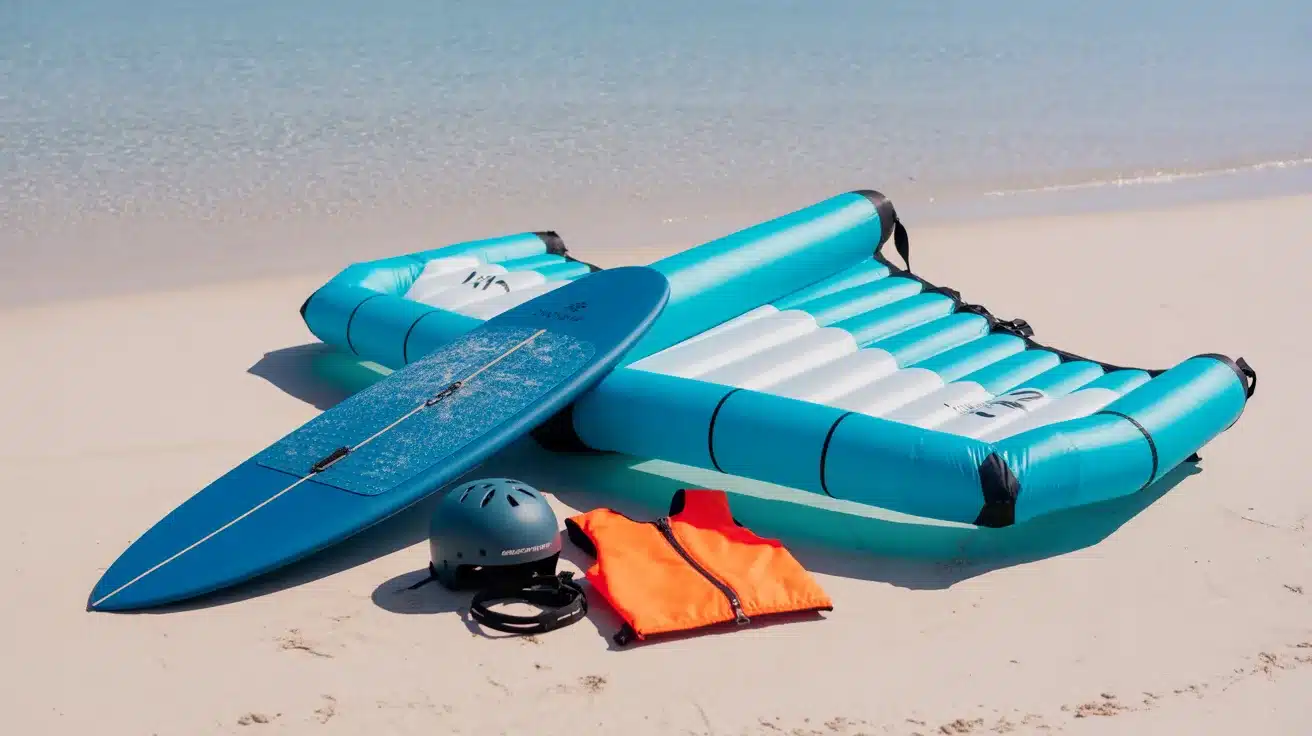
Getting the right equipment makes a bigger difference than most beginners expect. The right setup doesn’t just improve performance, it makes learning faster and far less frustrating.
The Wing: The wing is your power source, and its size directly affects how easy it is to control in different wind conditions.
- 5–7m → better for light wind
- 3–4m → suited for stronger wind
- Around 5m → ideal starting point for beginners
The Board: The board controls your stability, and beginners need a higher volume to stay balanced while learning.
- 100–150 liters → ideal for beginners
- More volume → more stability
- Smaller boards → for progression later
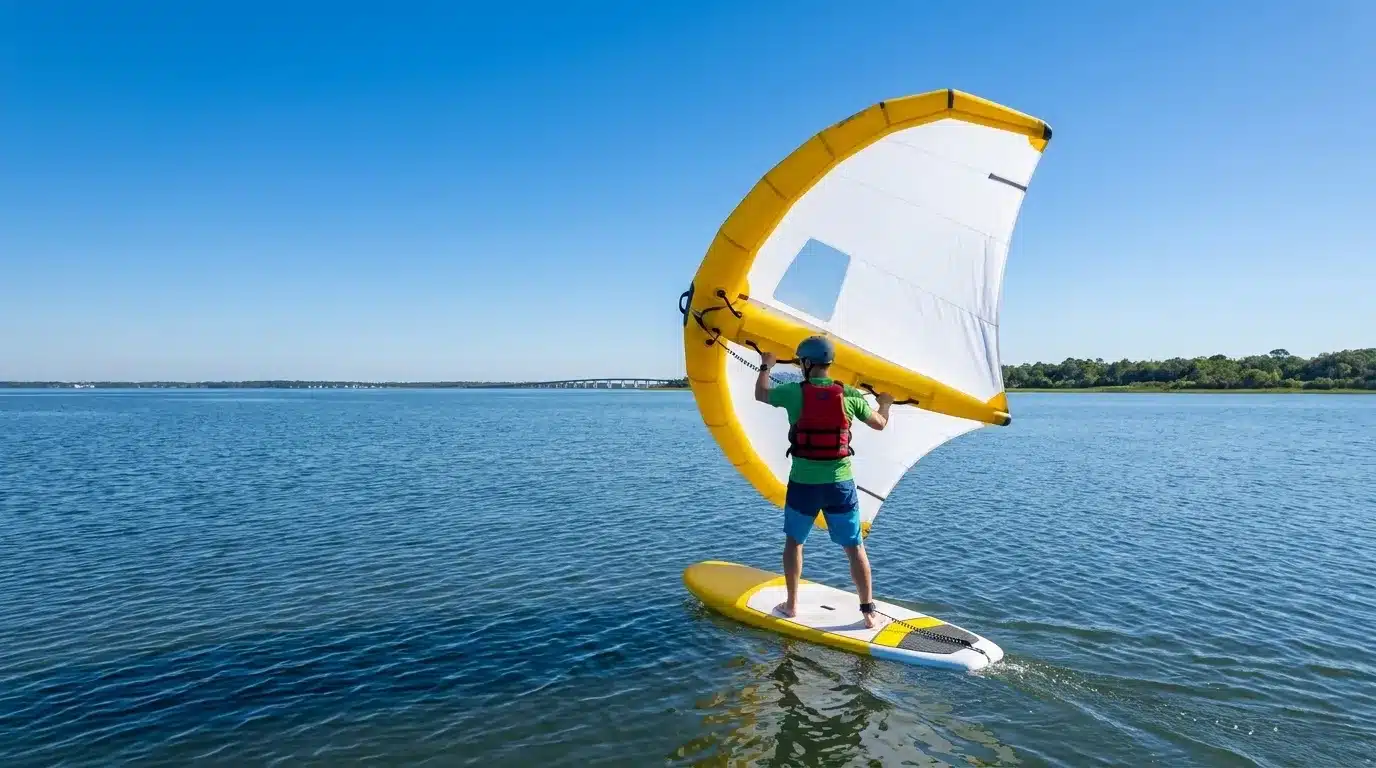
Leash & Safety Gear: A leash and basic safety gear keep you connected to your equipment and protected when conditions change.
- Wing leash → essential
- Board leash → recommended
- Helmet & impact vest → strongly advised
Cost (Reality Check): The total cost depends on gear quality, but most beginners fall within a predictable starting range.
- Wing → $400–$900
- Board → $700–$1500
- Full setup → ~$1200–$2500
Most beginners make the mistake of choosing the wrong inflatable paddle board or going too small to save money, but this usually slows learning and leads to an earlier upgrade. Starting with stable, beginner-friendly gear saves time and frustration.
How to Start Wing Surfing (Beginner Guide)
Starting the right way makes a huge difference in how quickly you progress. Follow these steps in order to avoid common beginner mistakes and build control from the start.
Step 1: Learn Wing Control on Land
Start by practicing on land with the wing so you understand how it catches wind, powers up, and depowers before getting into the water.
Step 2: Start in Light, Stable Conditions
Move to the water only in steady wind (around 12–18 knots). Begin on your knees and stand up gradually once you feel balanced, just as you would when learning to stand up on a stand-up paddleboard.
Step 3: Focus on Control Before Speed
Once you’re up, ride in a straight line first, using small weight shifts and gentle wing adjustments to control direction rather than chasing speed.
Step 4: Learn to Ride Upwind
This is the milestone that separates riders who stay on the beach from those who can actually explore. To go upwind, angle your board roughly 45 degrees into the wind and lean the wing slightly back and overhead.
The video below shows real wing surfing in action, from wing control to riding on the water.
For more tutorials like this, check out the Freewing World:
It takes a session or two to feel natural, but once it clicks, you stop drifting downwind and start riding where you want to go.
Best Conditions for Wing Surfing
Wing surfing works well in a wide range of conditions, which is one reason it is so popular.
Wing surfing works best in steady, moderate conditions, which is one reason it’s beginner-friendly.
- Wind Speed: 12–20 knots is ideal for beginners
- Water Type: Flat water like lakes, bays, or protected coastal areas
Popular Locations in the USA:
- Columbia River Gorge (Oregon/Washington)
- San Francisco Bay
- Hood River, Oregon
- Outer Banks, North Carolina
- Coastal Florida
The Columbia River Gorge (Oregon/Washington) is one of the most popular destinations for wing surfing in the United States. Its consistent thermal winds and protected flat water sections make it well-suited for riders at every level, from first-timers to advanced.
Avoid gusty or inconsistent wind when learning; steady wind matters more than strong wind.
Wing Surfing Tips for Beginners
Use a bigger board than you think you need. Stability speeds up learning more than anything else. Don’t fight the wing.
Keep your arms relaxed and let it do the work instead of forcing movement.
Look where you want to go. Your body naturally follows your head, which immediately improves control.
Practice in steady wind. Gusty conditions make learning unnecessarily hard and slow your progress.
Focus on staying balanced first. Speed and smooth turns come later; rushing it just sets you back.
For the best results, pair video learning with actual time on the water. Watching ten videos will not replace even one real session, but it helps a lot to go in with a mental picture of what you are trying to do.
Final Verdict: Is Wing Surfing Worth It?
If you want a wind sport that’s quicker to learn, works in lighter conditions, and doesn’t require complex equipment, wing surfing is one of the most practical options available right now.
It’s not effortless, and you will struggle at the beginning, but the learning curve is shorter compared to most alternatives. With the right setup and conditions, most people can get comfortable within a few sessions.
Start simple, focus on control, and build from there; that’s what actually leads to long-term progress.
Frequently Asked Questions
Is Wing Surfing Harder than Windsurfing?
No, wing surfing is generally easier because the wing is not attached to the board, making it easier to control. Most beginners find it quicker to learn compared to windsurfing.
How Long Does It Take to Learn Wing Surfing?
Most people can start moving within a few sessions and build basic control in a week or two. Becoming fully comfortable usually takes a few weeks of consistent practice.
Do you Need Lessons to Start Wing Surfing?
No, you can start on your own, especially by practicing wing control on land first. However, a short lesson can speed up learning and help you avoid common beginner mistakes.