
A simple knot can be the difference between loose gear and a secure setup. The clove hitch has earned its place among the most useful knots because it takes seconds to tie, adjusts quickly, and works across camping, boating, and everyday tasks.
Its strength comes from a simple wrapping motion, but choosing the right method matters. Tying it from the rope end, around an open anchor, or with a backup half-hitch can affect its performance.
Once you understand these techniques, you can use a clove hitch confidently whenever you need a fast and reliable temporary hold.
What Is a Clove Hitch Knot?
You’ll find the clove hitch in almost every rope skill list out there, and for good reason. It’s simple, fast, and works well when you need a knot that adjusts on the fly.
A clove hitch is a knot you tie by wrapping rope around an object twice, then tucking the end under the last wrap to lock it. The design creates two opposing wraps around the object, so the rope can slide when tension shifts, yet it still grips tight enough to hold.
That’s what makes it an adjustable binding and anchoring knot rather than a fixed one. Unlike a square knot or bowline, which stay rigid once tied, the clove hitch lets you fine-tune tension without untying it completely.
Once you get the hang of it, you’ll reach for this knot constantly, for tarp setups or tying gear to a post.
How to Tie a Clove Hitch Step by Step
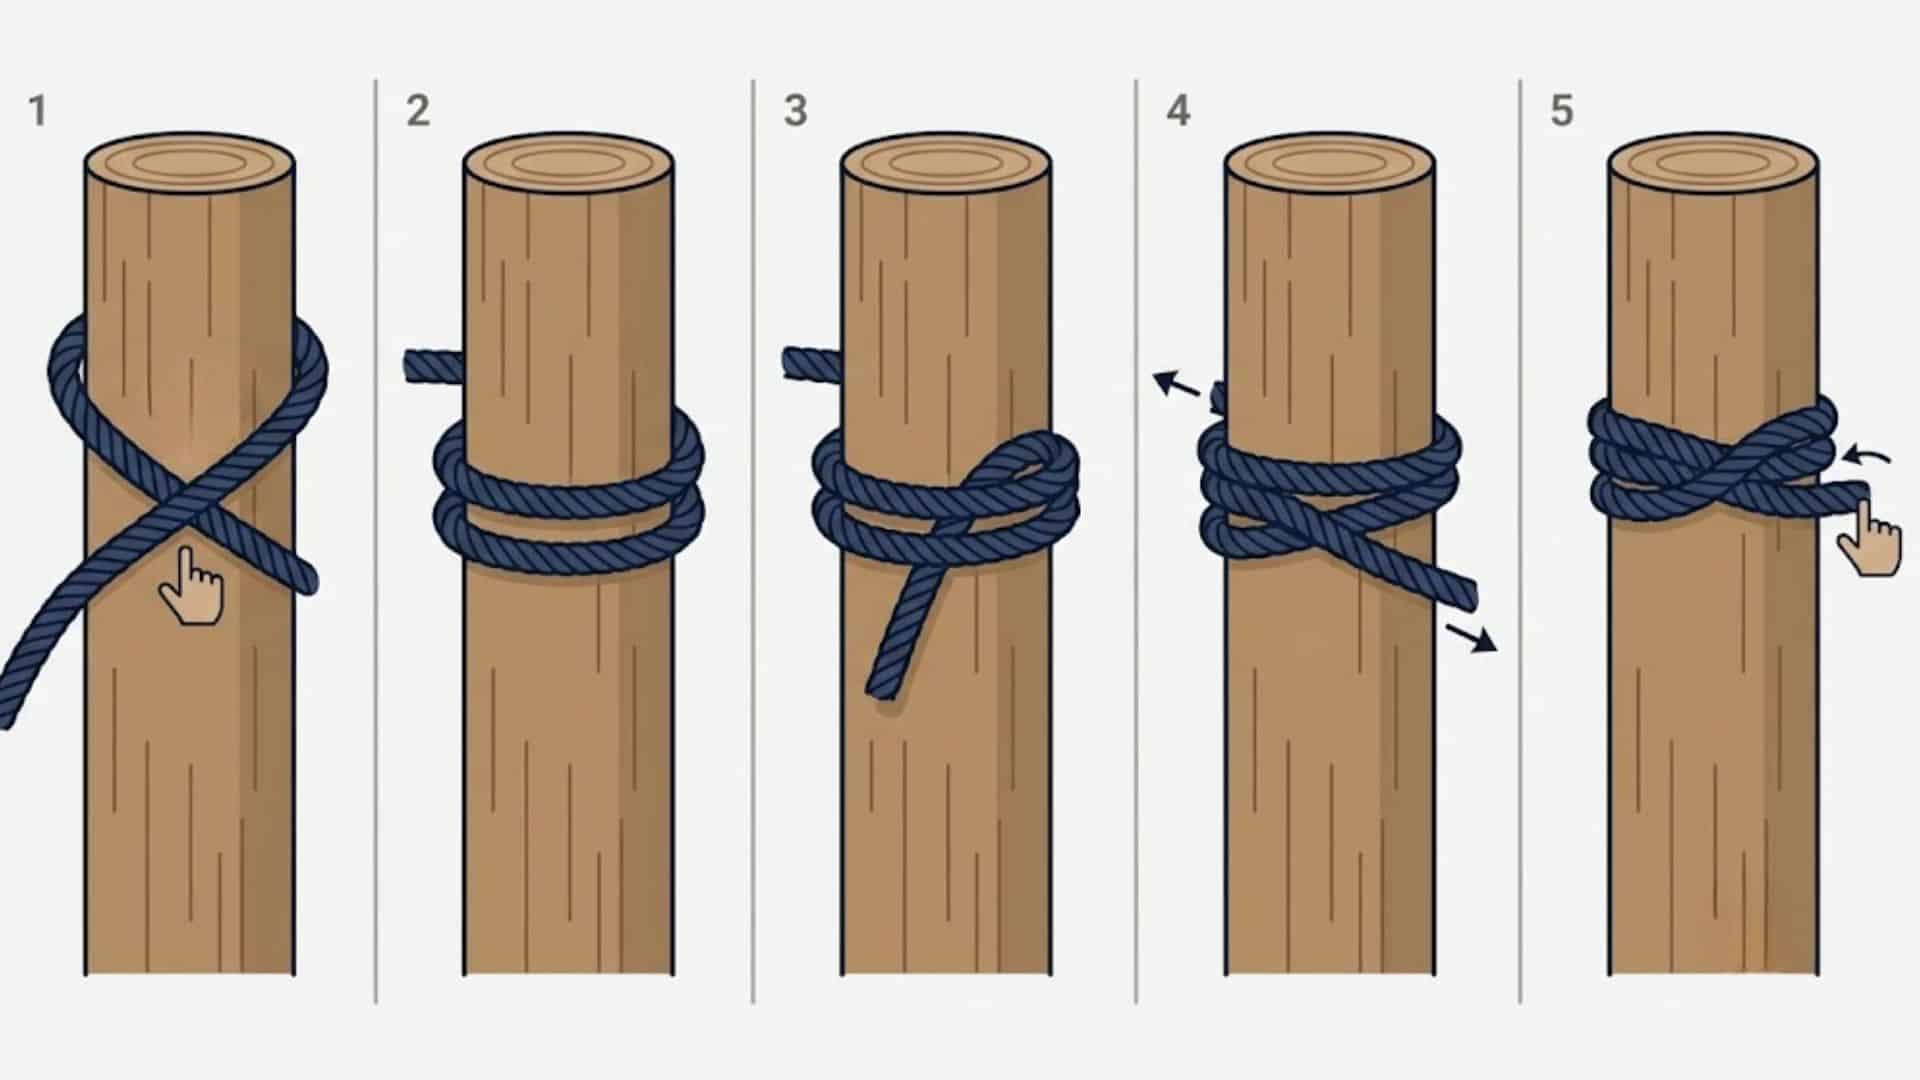
Tying a clove hitch takes just a few seconds once you know the motion. Follow these steps, and you’ll have it down after a couple of tries. It’s one of those skills that sticks once your hands learn the pattern.
Step 1: Wrap the Rope Around the Object
Take your rope and wrap it once around the post, pole, or rail. Cross the working end over the standing line to form an X shape. Keep the wrap snug against the object so it doesn’t shift while you work.
If the surface is smooth, hold the first loop steady with your thumb. This small step sets up the rest of the knot, so don’t rush through it. A steady first wrap makes every step after it easier.
Step 2: Make the Second Wrap
Wrap the rope around the object a second time, keeping it just above or below the first wrap. This creates the two opposing loops that give the knot its grip. Make sure the wraps sit close together instead of spreading apart.
Spacing them too far can weaken the hold once you tighten everything. Take your time here, since this wrap handles most of the locking. Getting this part right makes the next steps go much more smoothly.
Step 3: Tuck the End Under the Wrap
Slide the working end under the last wrap you made. Pull it through so it sits snug against the rope, not loose or twisted. Check that the tucked end lies flat rather than bunched up.
A clean tuck keeps the knot looking tidy and holding properly. If it feels awkward at first, try again slowly until it clicks. With a bit of practice, this motion becomes second nature.
Step 4: Tighten Both Wraps Evenly
Pull the standing end and working end in opposite directions. This locks the wraps together and removes any slack. Even pressure on both sides keeps the knot balanced and secure.
Avoid yanking one side harder than the other, as that can twist the wraps out of place. A steady, even pull works better than a quick jerk. This step is what really locks the knot into shape.
Step 5: Test the Knot’s Hold
Give the rope a firm tug to check that it holds under pressure. Adjust the wraps if they feel loose. Try shifting the object slightly to see if the knot stays put.
If it slips, redo the wraps and tuck again before moving on. A quick test now saves you trouble later. Skipping this check is how a weak knot goes unnoticed until it’s too late.
That’s the whole process, and with a little practice, you’ll tie it without even thinking twice. Soon enough, you’ll be tying it on autopilot, no matter what you’re securing. (Special thanks to AnimatedKnots for this clove hitch tying video)
Different Ways to Tie a Clove Hitch
There’s more than one way to tie this knot, and the method you choose depends on what you’re working with. Here are three approaches worth knowing.
How To Tie A Clove Hitch With The Rope End
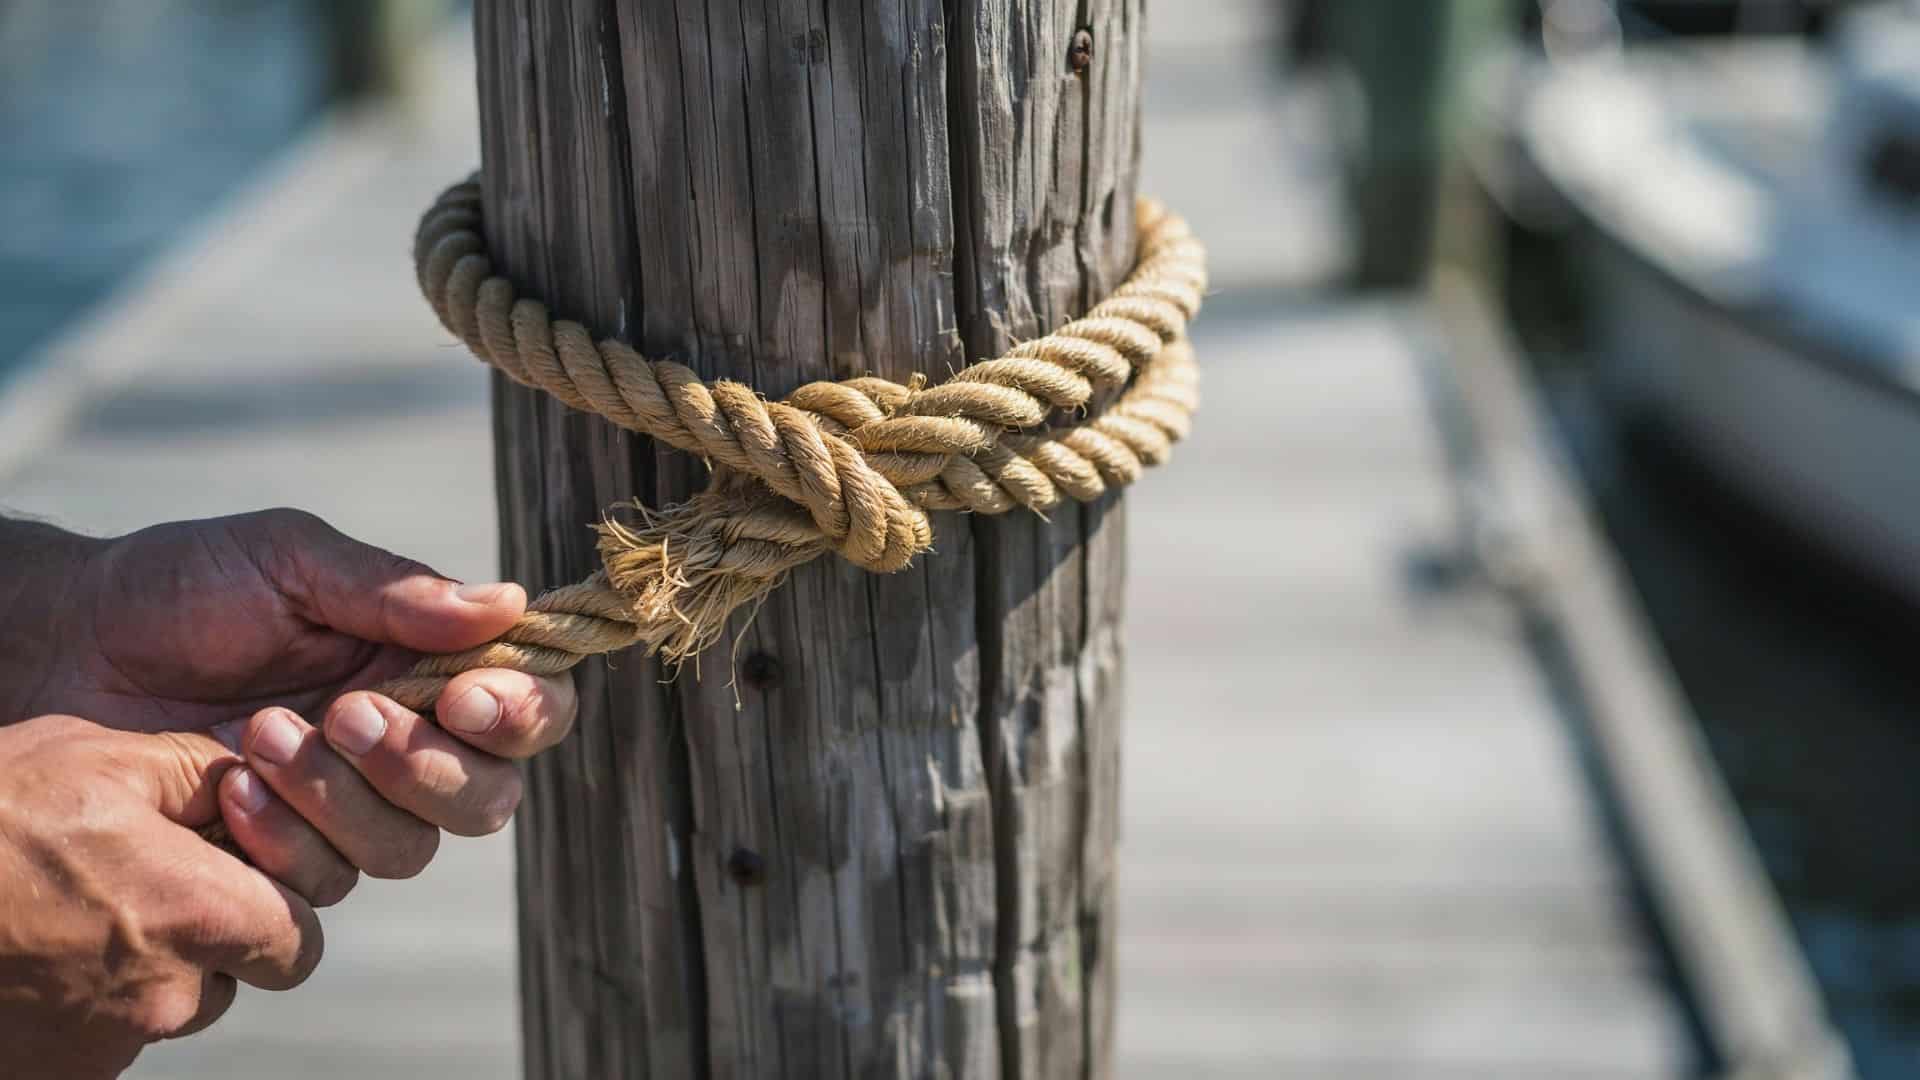
This method uses the working end of the rope to build both wraps around the object.
- Wrap the working end around the post or anchor.
- Cross the rope over itself to create the first loop.
- Wrap the rope around the object again.
- Slide the working end underneath the second wrap.
- Pull both ends to tighten the knot.
Keep the standing end steady while you shape the wraps, since a wobbly base makes the whole knot harder to tighten evenly.
How To Tie A Clove Hitch Around An Open Anchor
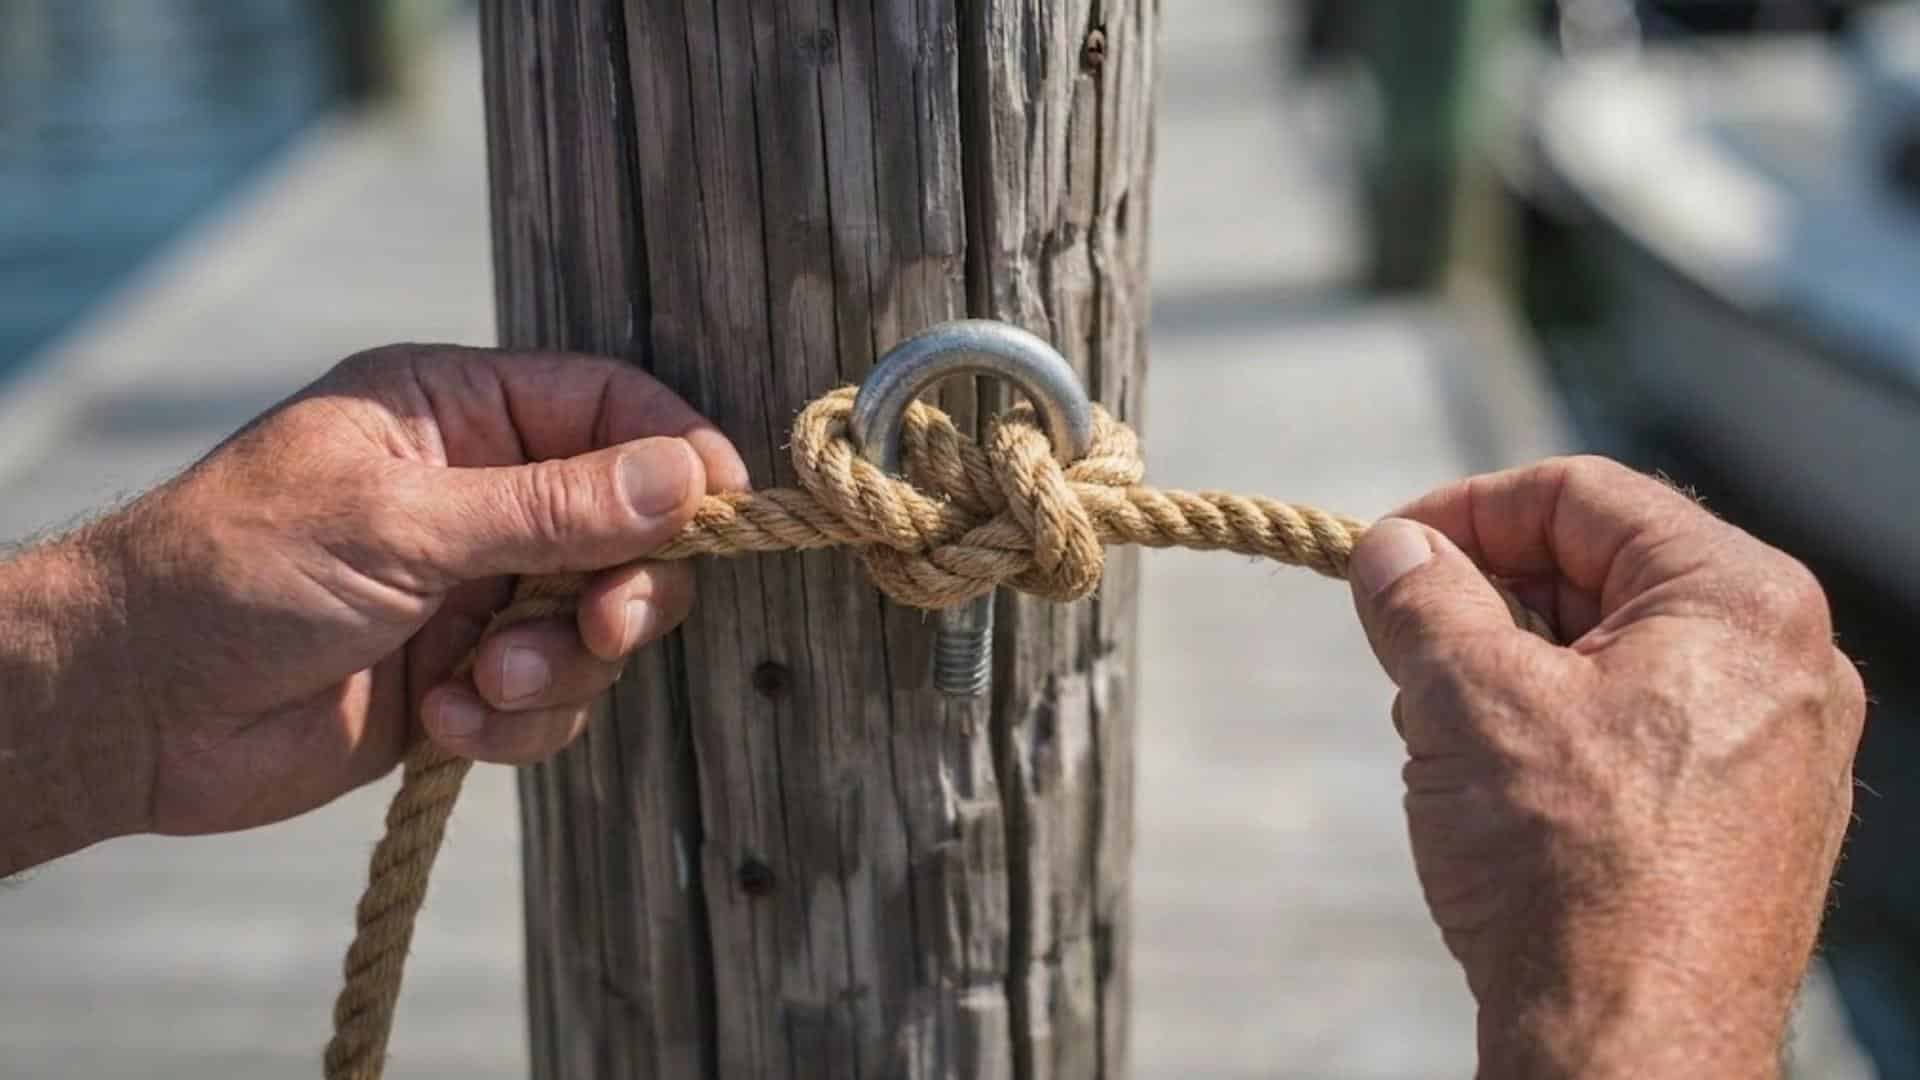
This version works when you can loop the rope over an open point instead of wrapping around a solid post.
- Make two loops in the rope.
- Place one loop over the anchor.
- Position the second loop beside the first.
- Pull both loops together.
- Tighten the knot.
It’s a handy trick for rings, hooks, and other anchor points that don’t allow a direct wrap.
Tips for a More Secure Clove Hitch
A few small adjustments can turn a basic clove hitch into a much more dependable knot. Here’s how to apply them.
| Tip | How to Apply It |
|---|---|
| Add a Half Hitch | Tie an extra half-hitch afterward to lock it and prevent slipping. |
| Keep Consistent Tension | Pull both ends evenly so the wraps sit tight together. |
| Dress the Knot Properly | Straighten twists before tightening for a cleaner, stronger hold. |
| Match Rope Size With the Application | Use thicker rope for heavy loads, thinner for light tasks. |
| Test Before Relying on It | Apply pressure and check the grip before trusting real weight. |
Take a few extra seconds to apply these tips, and you’ll trust this knot a lot more when it matters.
Types of Clove Hitch Knots
The clove hitch isn’t just one fixed knot; it has a few variations that suit different situations.
1. Standard Clove Hitch
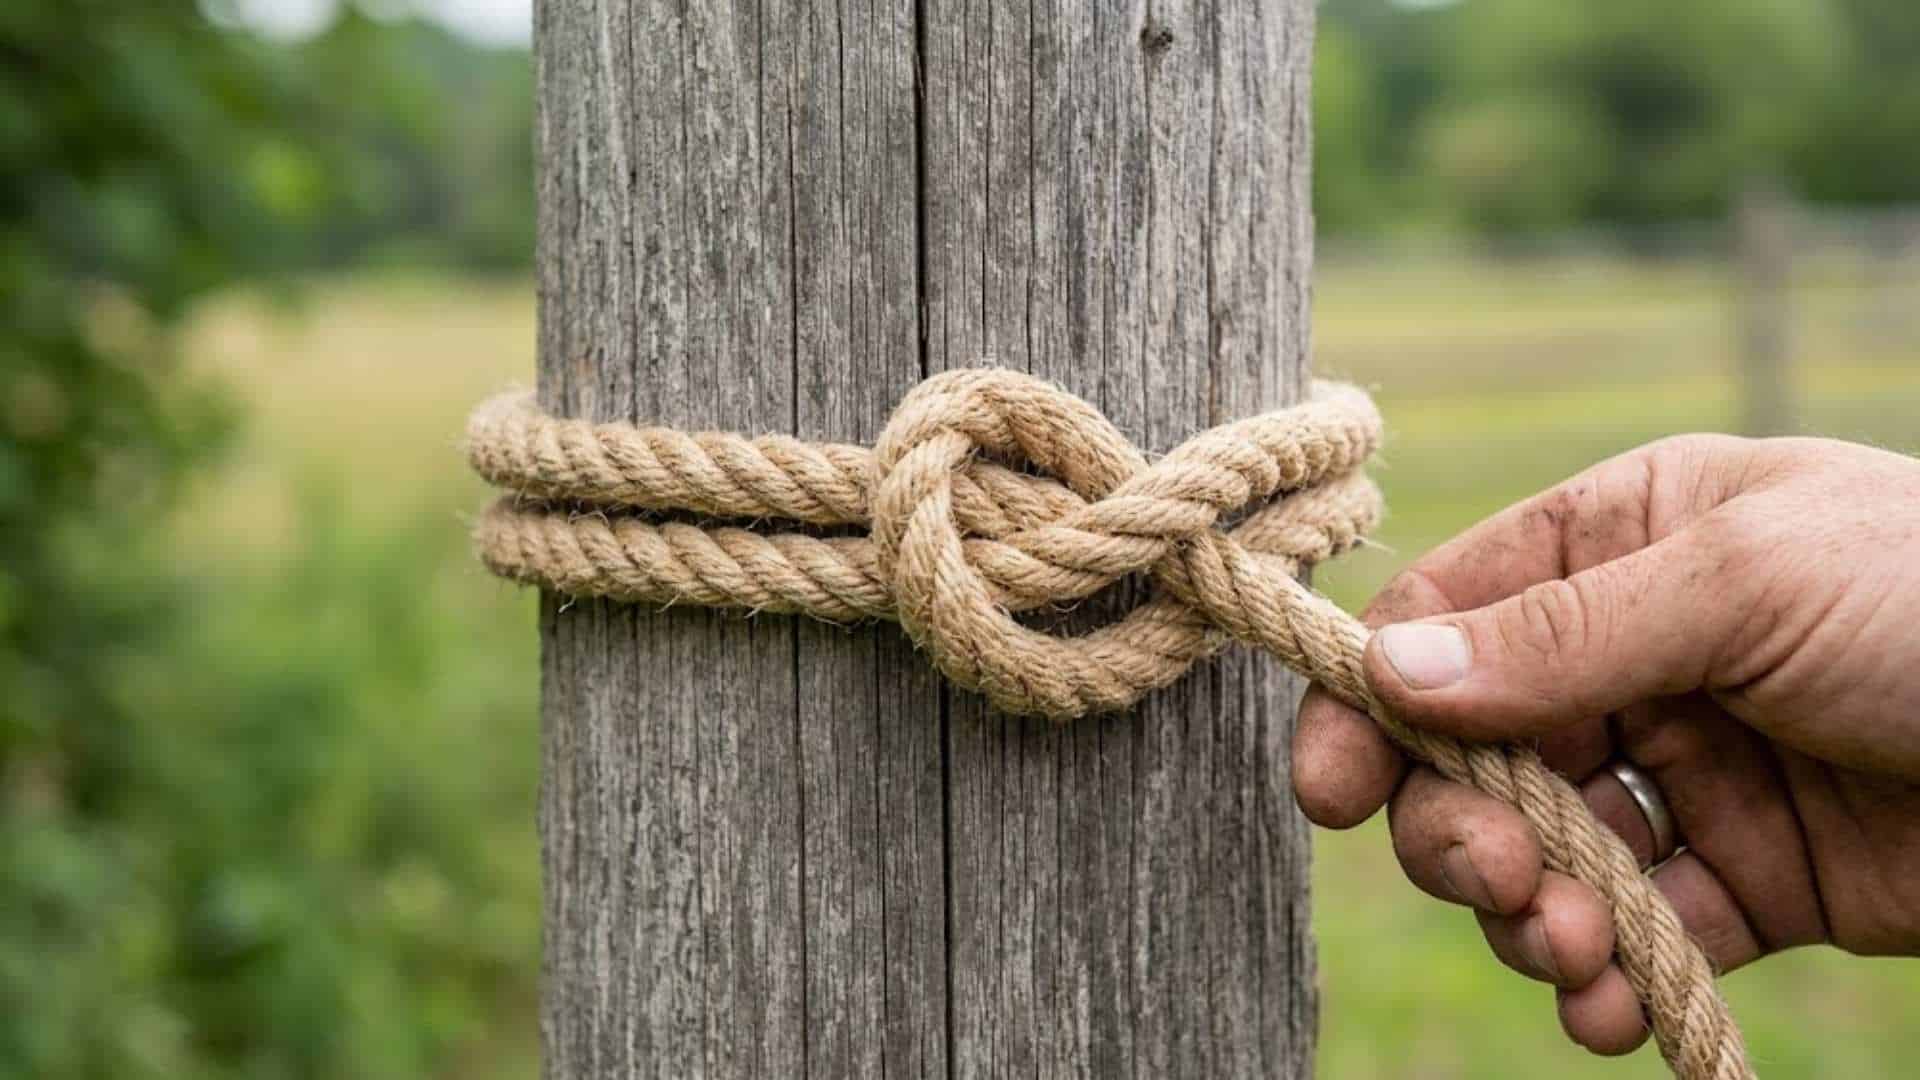
This is the basic version tied directly around an object using both ends of the rope. It forms the base structure that all other variations build on, so learning this one first makes the rest easier to pick up.
- Best Used For: Quick anchoring to poles, posts, or railings during short-term tasks.
- How It Differs: Forms the foundation for all other variations, with no extra tucks or loops added.
- How To Tie It: Wrap the rope twice around the object, then tuck the end under the last wrap.
- When To Avoid It: Skip it for heavy or shifting loads, since it can slip under pressure.
2. Clove Hitch on a Bight
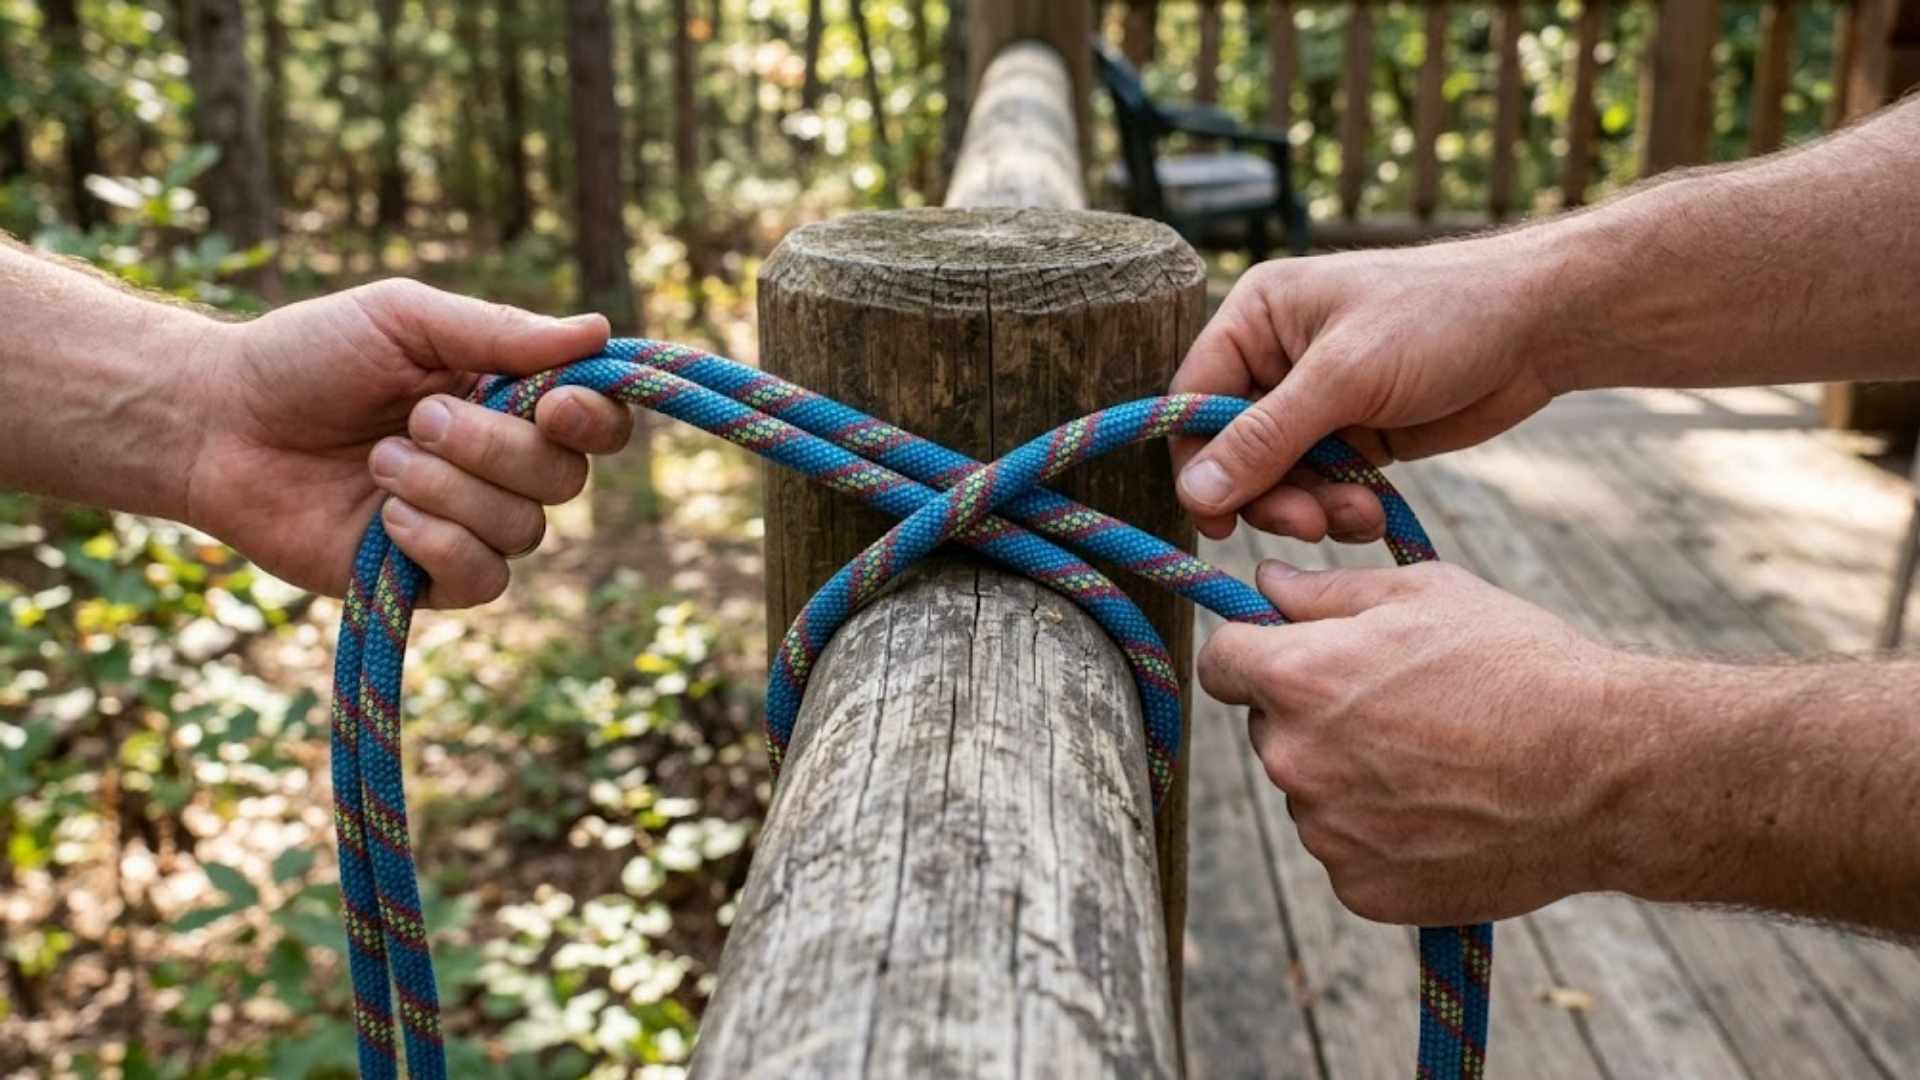
This version is tied using a folded loop instead of the rope’s end, which lets you slide the whole knot over an object. It comes in handy when you can’t access either end of the rope.
- Best Used For: Situations where the rope’s end is inaccessible or already tied off elsewhere.
- How It Differs: Uses a doubled rope section, not a single end, to form the wraps.
- How To Tie It: Fold the rope into a loop, then wrap and tuck it just like the standard version.
- When To Avoid It: Avoid it if you need to adjust tension often, since sliding it takes more effort.
3. Slipped Clove Hitch
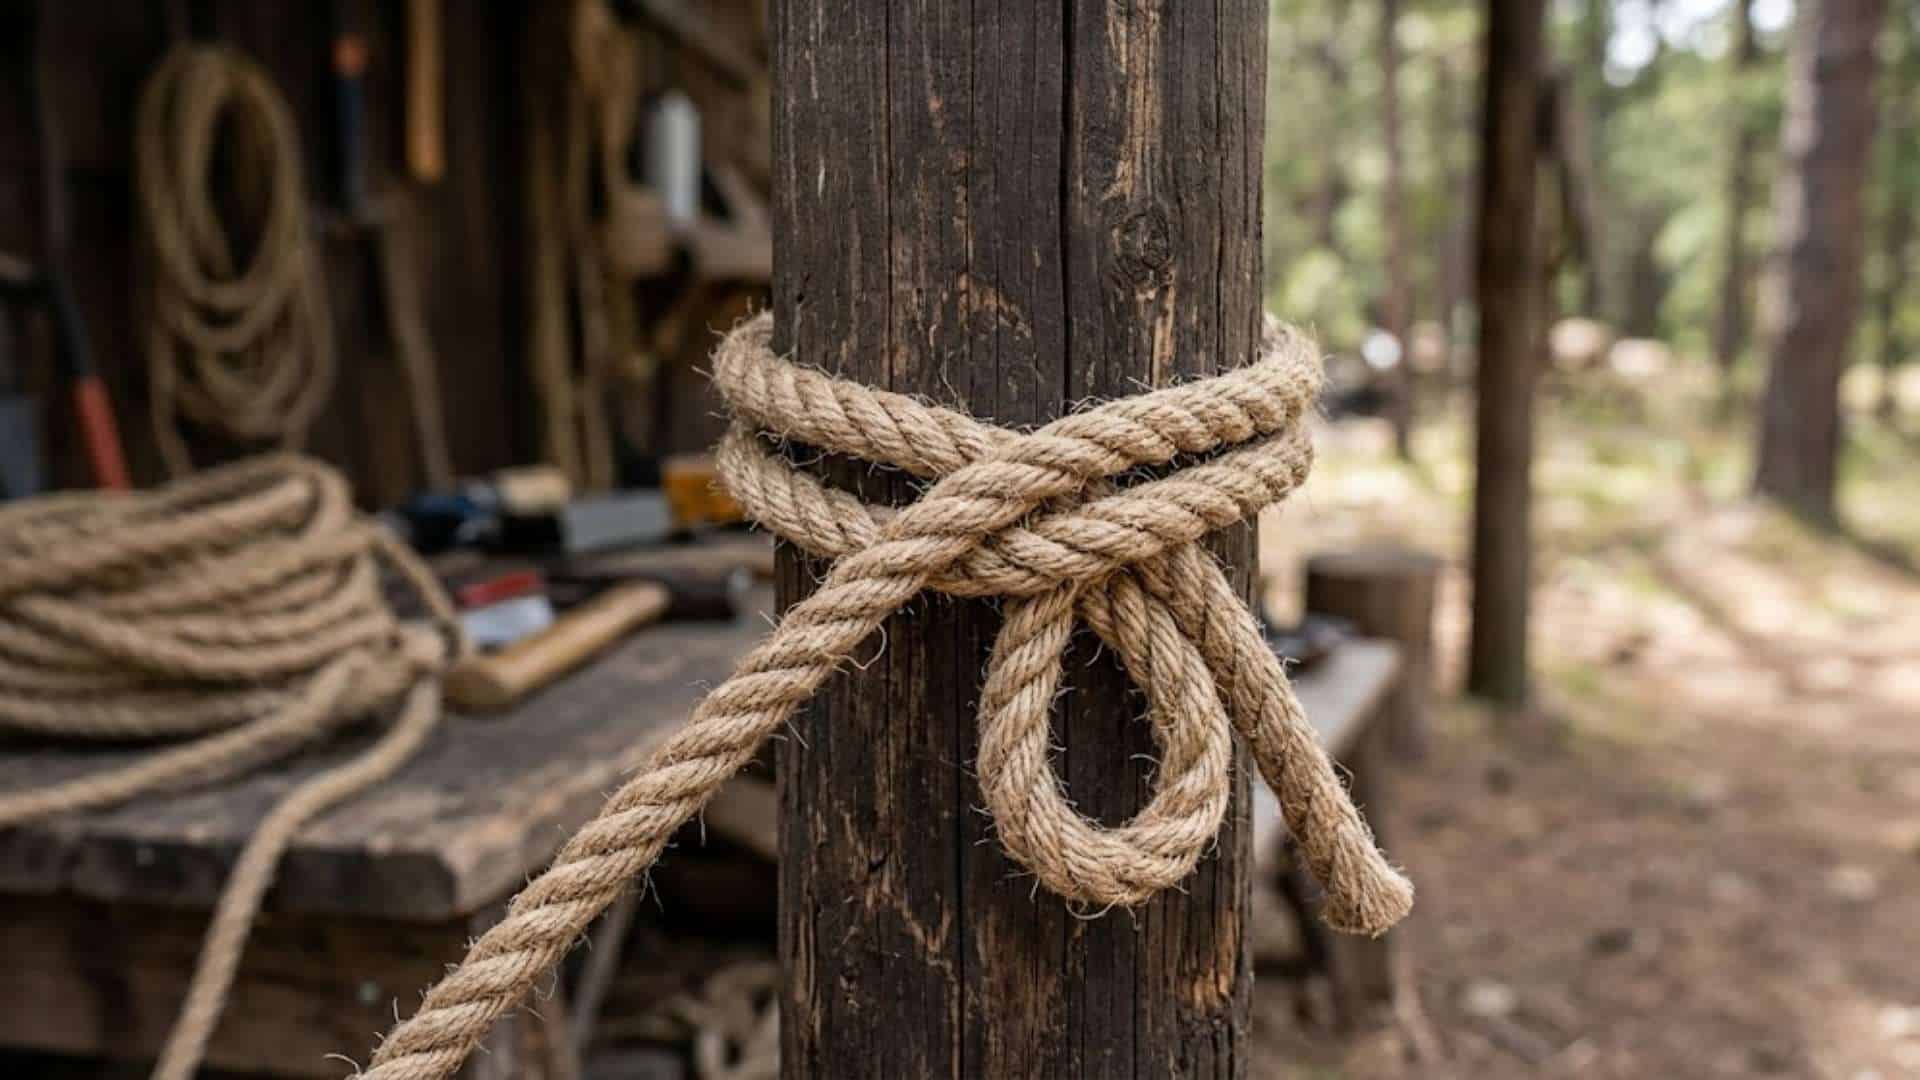
This quick-release version is made by tucking a loop instead of pulling the full end through. One tug on the tail undoes the whole knot instantly.
- Best Used For: Temporary setups where you need to release the rope fast.
- How It Differs: Releases with one pull, unlike the standard knot, which needs to be worked loose.
- How To Tie It: Follow the usual wraps, but tuck a bight instead of the rope’s end.
- When To Avoid It: Don’t use it for anything permanent, since it can loosen on its own.
4. Boom Clove Hitch
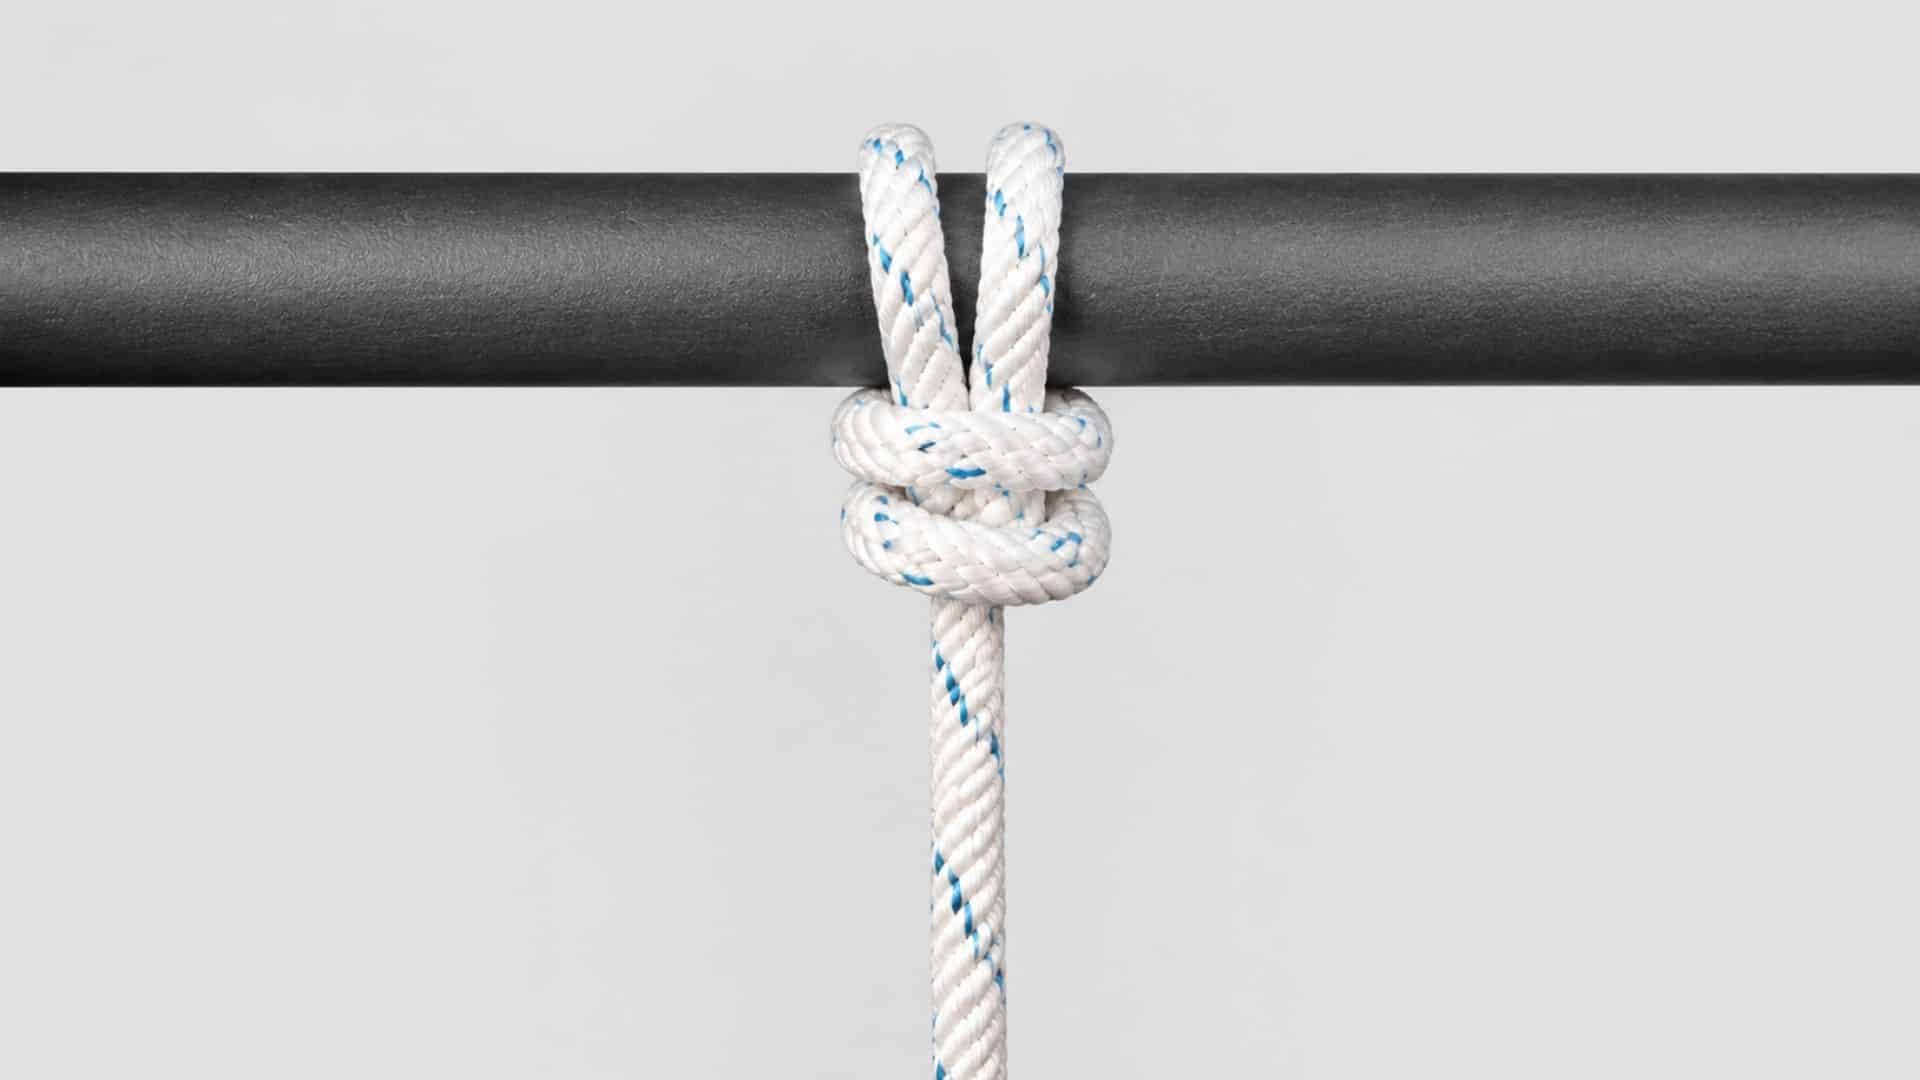
This knot uses a series of overlapping wraps around the post, finished with a single tuck, giving it more holding power than a standard clove hitch. It takes a bit more rope, but the wraps resist slipping even under repeated stress.
- Best Used For: Attaching a line to a smooth pole, pipe, or sail boom, especially where the load pulls at a right angle to the object.
- How It Differs: Uses four full turns instead of two, so it holds far better on smooth or slippery surfaces than a basic clove hitch.
- How To Tie It: Wrap the rope around the post four times, each turn overlapping the last, then tuck the working end under one of the earlier turns to lock it and tighten.
- When To Avoid It: Skip it when rope length is limited, since it needs more rope than simpler hitches.
5. Double Clove Hitch
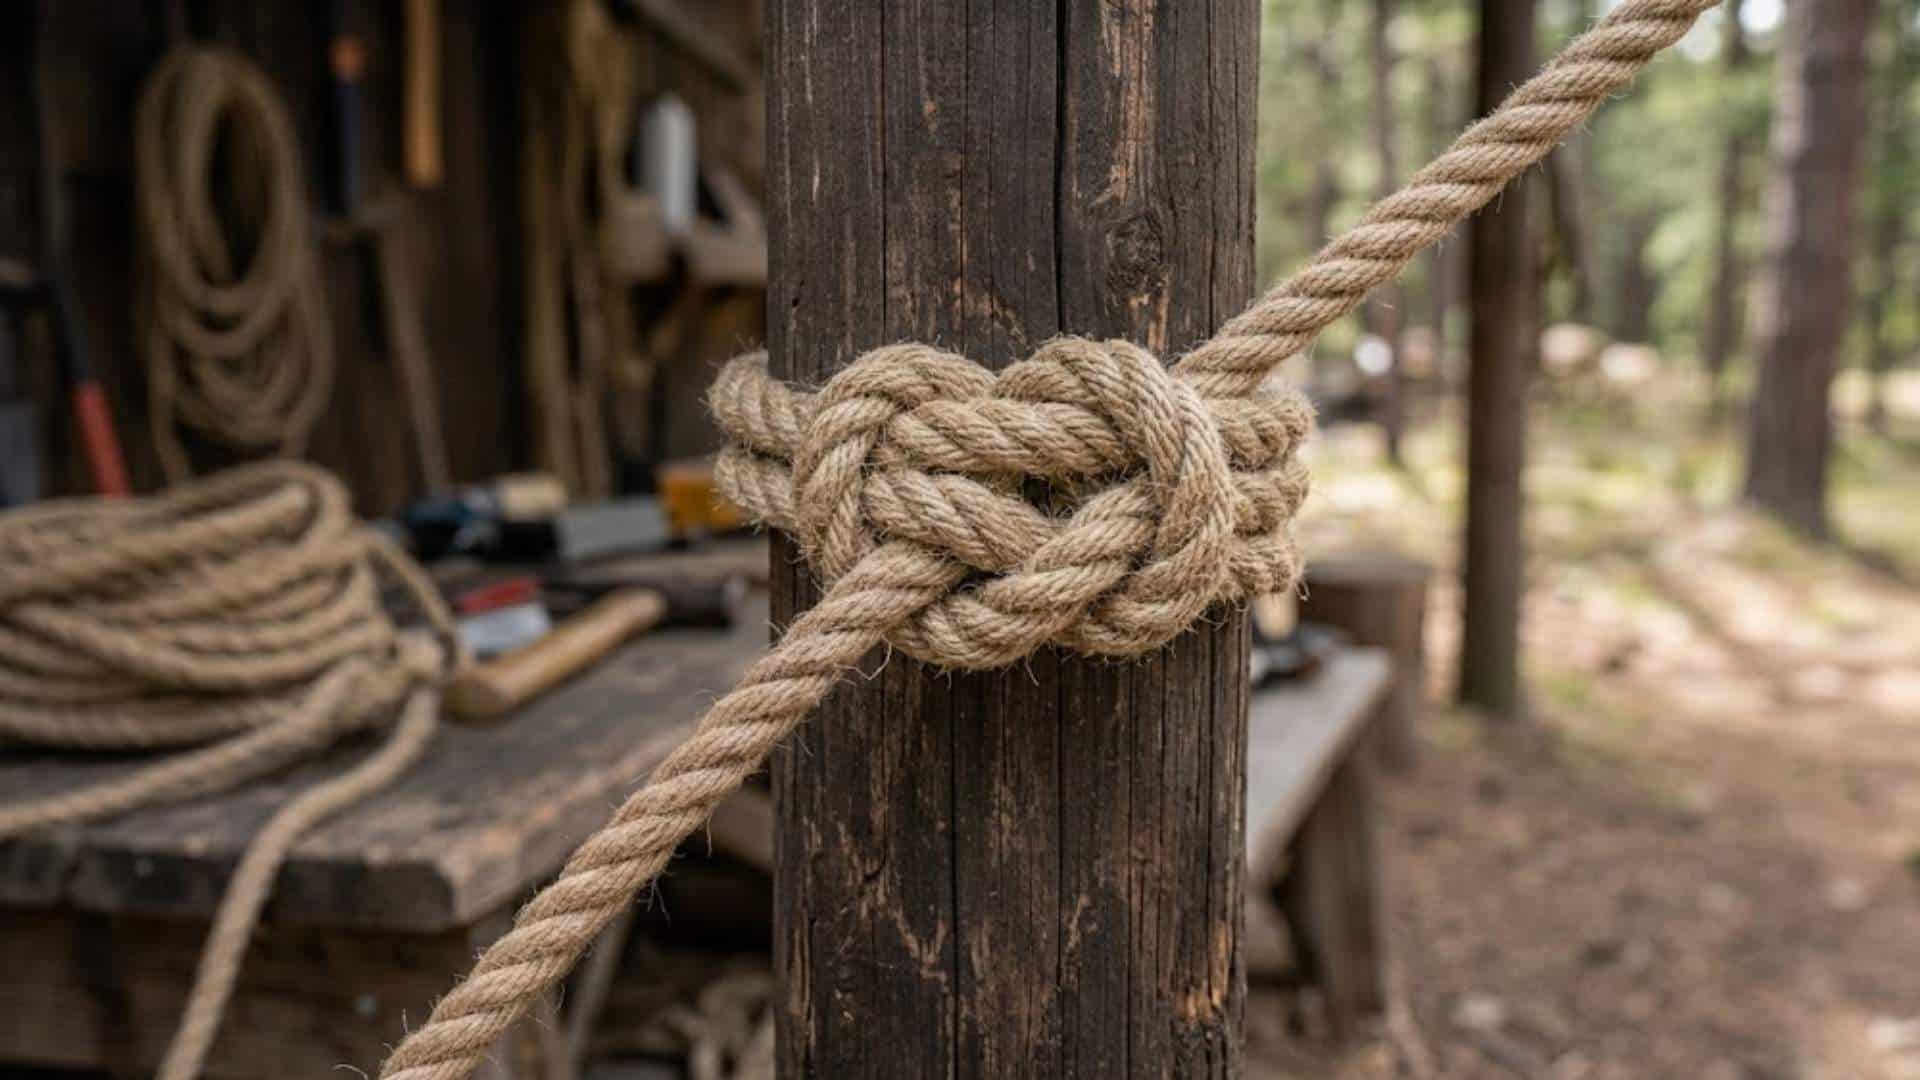
This type uses two extra wraps around the object for added grip and holding power. It takes a bit more rope, but the payoff is a much stronger hold.
- Best Used For: Heavier loads that need extra hold and won’t be moved often.
- How It Differs: Bulkier but stronger than the standard tie, thanks to the added wraps.
- How To Tie It: Repeat the wrapping step twice, then tuck the end under the final wrap.
- When To Avoid It: Avoid it for lightweight tasks, since the extra bulk isn’t necessary.
Once you know these variations, you’ll pick the right one without a second thought. That kind of quick judgment comes naturally, the more you practice tying each one.
Common Uses for a Clove Hitch
This knot shows up in more places than you’d expect, from campsites to docks to your garage shelf. Here’s a quick look at where it earns its keep.
| Category | Common Uses |
|---|---|
| Camping and Outdoor | Securing tarps, attaching guy lines, and hanging equipment from branches or poles. |
| Boating and Docking | Temporary boat attachment, securing lines to posts, and quickly adjusting rope length as tides shift. |
| Climbing and Rescue | Setting temporary anchors and organizing gear on ropes, though it should never be your sole safety knot in critical situations. |
| Everyday Uses | Bundling objects, hanging tools, and creating temporary tie-downs around the house or garage. |
| Gardening and Yard Work | Tying plant stakes, securing trellis frames, and bundling branches for disposal. |
| DIY and Crafting | Holding materials in place while gluing, wrapping decorative rope work, and securing project pieces during assembly. |
No matter what you’re working on, this knot adapts to the job without much fuss. If you’re building out your list of boating knots, this is one worth keeping in easy reach for docking and fender jobs alike.
When Not to Use a Clove Hitch
As handy as it is, the clove hitch isn’t perfect for every job. Knowing its weak points helps you avoid using it where it might fail.
- Can Slip Under Load: The knot can loosen or slide if the rope shifts or the load isn’t steady.
- Not Ideal for Critical Safety: It shouldn’t be your only knot for climbing, rescue, or life-safety situations.
- Weakens on Smooth Surfaces: Slick poles or rails give the wraps less to grip, raising the chance of slipping.
- Loosens With Repeated Motion: Constant movement or vibration can work the wraps loose over time.
- Not Great for Heavy, Static Loads: Without extra locking wraps, it may not hold up well under sustained weight.
- Requires Regular Checking: You’ll need to inspect it often, since it doesn’t stay as secure as a locking knot.
Once you know these limits, you’ll know exactly when to reach for a stronger knot instead. A little awareness now saves you from a knot failure later.
For activities involving higher risks, always follow recommended outdoor safety practices and understand proper equipment use before relying on any knot.
Clove Hitch vs. Other Popular Knots
Knowing how the clove hitch compares to other knots helps you pick the right one for the job. Here’s a side-by-side look.
| Knot | Best For | How It Compares |
|---|---|---|
| Clove Hitch | Quick, adjustable binding to poles or posts. | Fast to tie but can slip under heavy or shifting loads. |
| Square Knot | Joining two ropes of similar thickness. | Prone to slipping or capsizing, especially when joining ropes of different sizes. |
| Bowline | Creating a fixed loop that won’t tighten. | Stronger and more reliable for load-bearing situations. |
| Taut-Line Hitch | Adjustable tension on tent lines or tarps. | Grips better under tension than a clove hitch. |
| Timber Hitch | Dragging or hoisting long objects, such as logs. | Holds tight under pulling force, but releases easily once tension is removed. |
Each knot has its place, so match the one you use to the task at hand. Once you compare them, the clove hitch’s role becomes a lot clearer.
Mistakes to Avoid When Tying a Clove Hitch
Even a simple knot like this one goes wrong more often than you’d think. Watch out for these common slip-ups.
- Crossing the rope incorrectly: Wrapping in the wrong direction throws off the whole structure and weakens the hold.
- Creating Loose Wraps: Leaving slack between wraps lets the knot shift or slip once weight is applied.
- Using It for Unsafe Applications: Relying on it for climbing or rescue situations puts you at unnecessary risk.
- Forgetting to Test the Knot: Skipping a quick tug test means you won’t catch a weak knot until it fails.
- Confusing It With a Constrictor Knot: Mixing up the two leads to a knot that’s either too loose or too hard to untie.
- Tightening Unevenly: Pulling one side more than the other twists the wraps, reducing overall strength.
Avoiding these mistakes takes little effort, but it makes a real difference in how well your knot holds.
Final Thoughts
A clove hitch is a small knot with a big purpose. Once you understand how to tie a clove hitch, you can handle quick rope setups with more confidence and control.
Learning how to tie a clove hitch knot gives you a practical skill for securing gear, organizing lines, and managing temporary attachments during outdoor activities.
The key is knowing the right method and using it in the right situation. Practice the steps, check your wraps, and test the hold before relying on it. Grab a rope and start practicing today to make this useful knot second nature.
Frequently Asked Questions
How Strong is a Clove Hitch Knot?
A clove hitch holds moderately well but can slip under heavy loads, so use it only for non-critical tasks.
Is a Clove Hitch Easy to Untie?
Yes, a clove hitch unties quickly and easily, even after bearing weight, making it ideal for temporary bindings.
Can a Clove Hitch Hold Weight?
Yes, a clove hitch can hold moderate weight, but it may slip or loosen under sudden force or heavy loads.