Most people who use a rowing machine are doing it wrong. They pull hard with their arms, hunch their back, and wonder why they feel sore the next day.
Bad rowing form wastes your energy and puts real stress on your back and shoulders. The good part is that fixing your technique is not complicated.
Once you learn the correct sequence and the four key phases of every stroke, rowing becomes more powerful, more comfortable, and way more effective.
What is Proper Rowing Technique?
Proper rowing technique means using your body in the right order to move the handle or oar as efficiently as possible. The most important thing to know before anything else: your legs do most of the work, not your arms.
When you row correctly, you move more power with less effort. You also protect your back, knees, and shoulders from injury. Good form is not just for athletes. It matters even more for beginners because bad habits are hard to break later.
This same movement pattern is also used in competitive rowing, where efficiency and timing matter far more than raw strength.
The 4 Phases of the Rowing Stroke
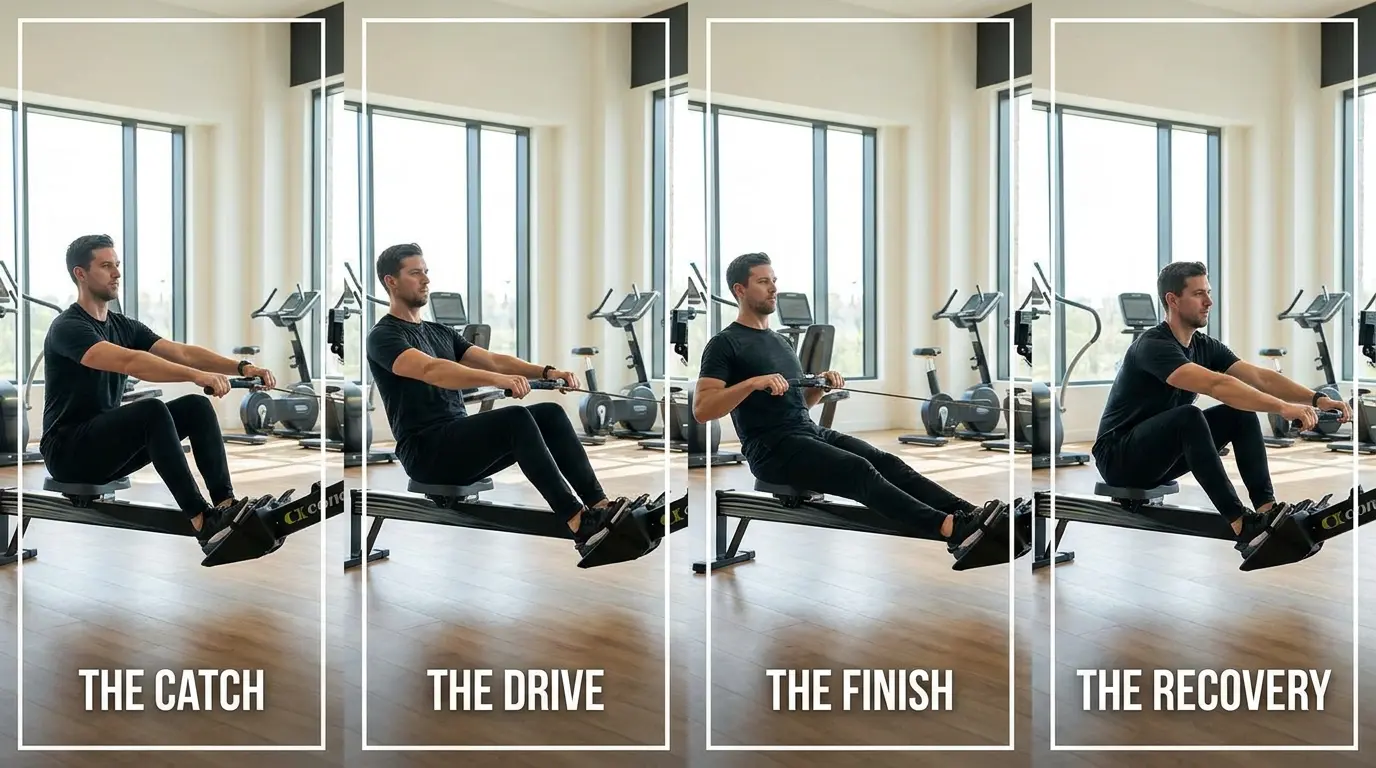
Every rowing stroke has four phases. Learn these, and everything else becomes easier.
1. The Catch (Starting Position)
This is where the stroke begins. Sit up tall with your shins vertical, arms straight out in front of you, and lean slightly forward from your hips. Your back stays straight. Do not round your shoulders or collapse forward.
Think of this as loading a spring. Your legs are coiled and ready to push.
- Grip the handle firmly while keeping the wrists flat.
- Arms extended out toward the flywheel.
- Maintain an upright posture with a slight forward lean.
- Knees bent to keep the seat forward.
2. The Drive (Power Phase)
This is where you create power. The order matters more than anything else here:
Legs first. Then back. Then arms.
Push through your feet to straighten your legs. As your legs near full extension, lean back slightly from the hips, keeping your core tight. Only then do you pull the handle toward your lower chest with your arms.
Most people skip straight to pulling with their arms. This is the biggest mistake in rowing.
Your legs are the engine, and studies on leg power in rowing confirm that the lower body generates the majority of force in every stroke. Your arms are just the finish.
- With arms extended, press through the foot pedals.
- Keep your posture firm and upright with a tight core.
- Before your legs reach full extension, start pulling on the handle and lean back slightly.
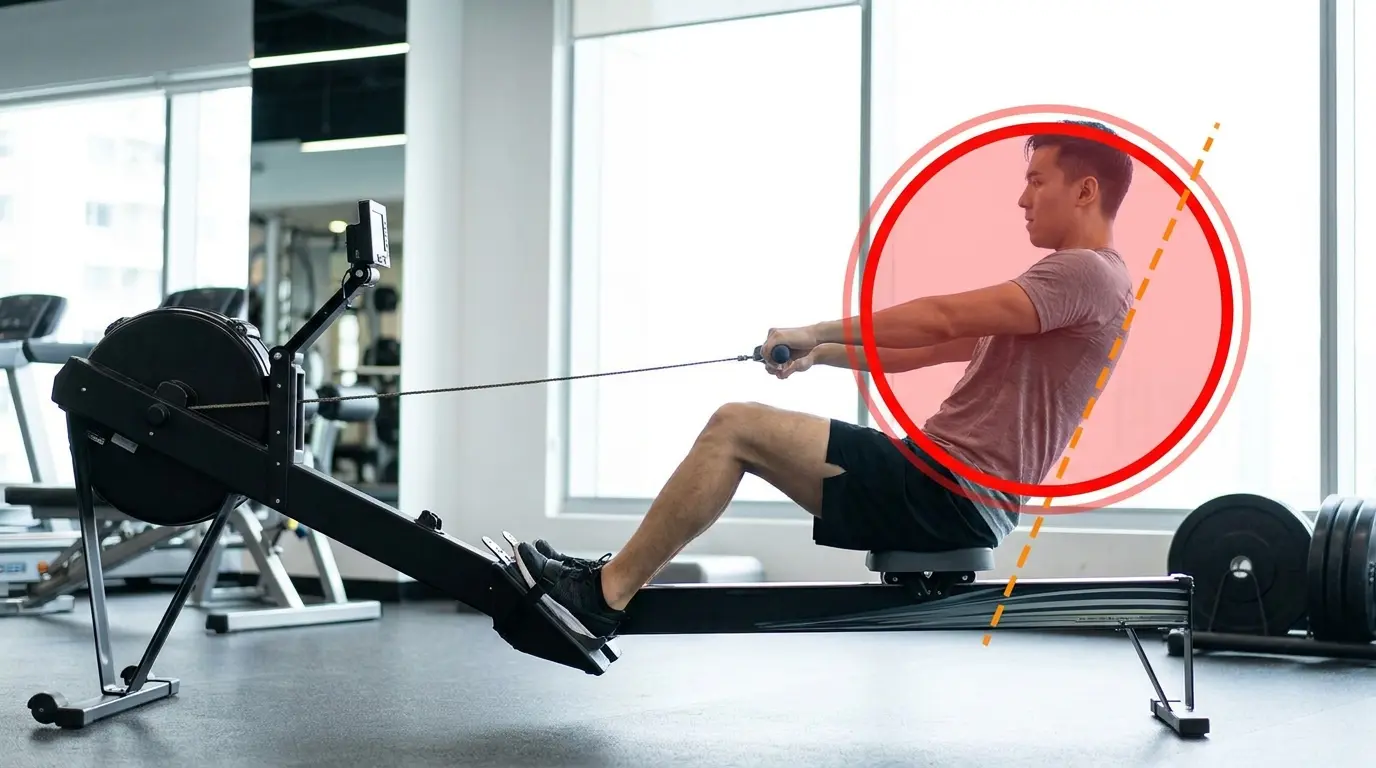
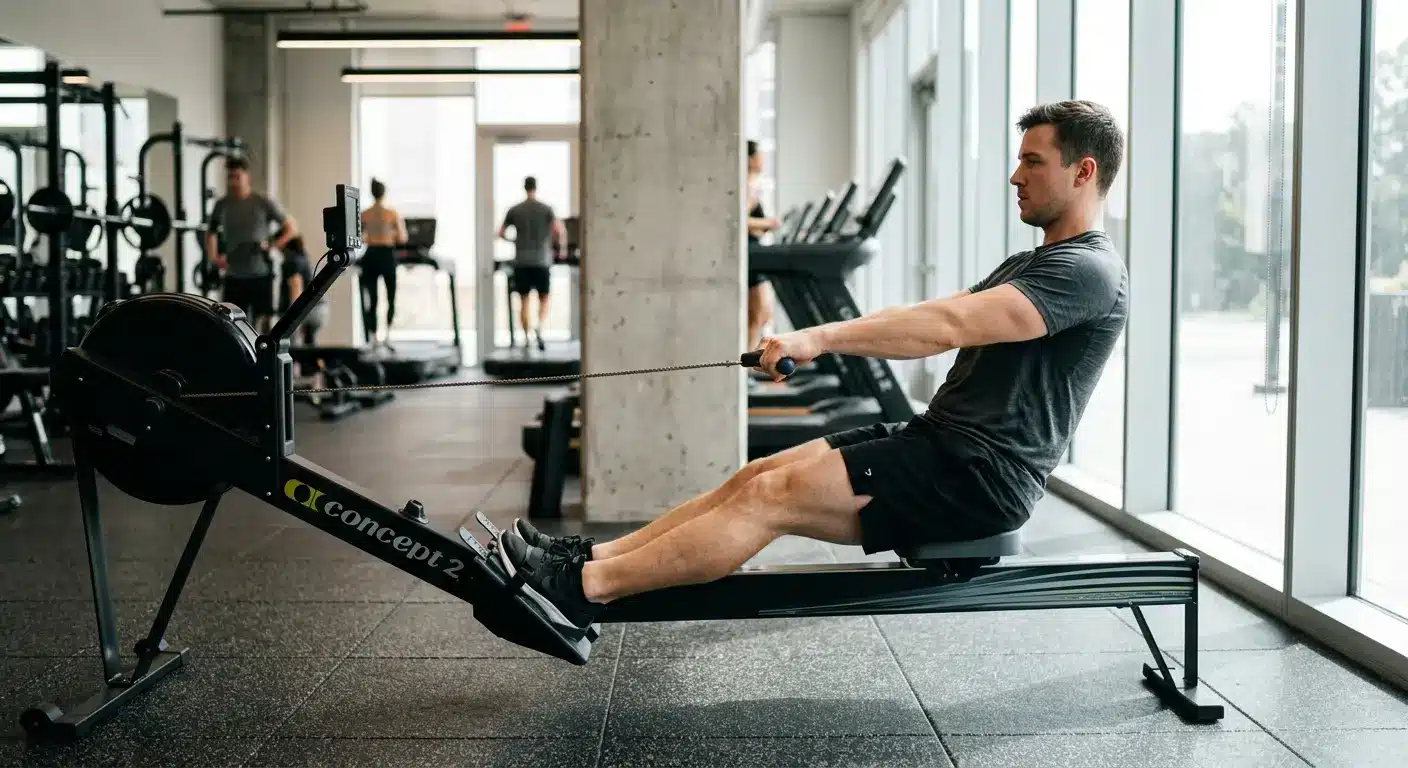
3. The Finish (End Position)
At the finish, your legs are straight, your back is leaned back slightly (not collapsed), and the handle is at your lower chest with elbows behind you. Keep your wrists flat and shoulders relaxed. Hold this position for just a moment before returning.
- Pull the handle all the way towards the space between the navel and chest.
- Exhale while continuing to bring your legs to near full extension and lean back.
4. The Recovery (Return Phase)
Now you reverse the order. Slowly:
Arms first. Then body. Then legs.
Extend your arms away from your body, then hinge forward from your hips, then let your knees bend as you slide back to the catch position. This should take about twice as long as the drive.
- Extend the arms toward the front of the rower.
- Lean your torso forward, following your arms toward the front of the rower.
- Then bend your knees, allowing the hips to slide the seat back into the Catch position.
- Inhale before your next stroke.
Quick summary: Drive = power. Recovery = control.
The Correct Rowing Sequence (The Golden Rule)If you remember nothing else, remember this:
Breaking this order is the number one reason people feel rowing in their backs rather than their legs. It also makes you tire out faster. When the sequence is right, every stroke feels smooth and powerful. |
Common Rowing Mistakes and How to Fix Them
These are not rare errors. They are the default for most beginners and even intermediate rowers who have never learned proper sequencing.
Pulling with Arms Too Early
Rowing appears to be an upper-body movement at first glance, leading many people to initiate the pull with their arms.
- Why it is bad: You lose all the leg drive. Your arms take on work they are not built for, and you get tired fast.
- Fix: Keep your arms straight until your legs are almost fully extended. Delay the arm pull.
Rounding Your Back
Posture usually breaks when fatigue builds or when the focus shifts from control to speed.
- Why it is bad: This puts a huge strain on your lower back. Clinical reviews on rowing back injuries show that it is the most frequently reported injury site among rowers.
- Fix: Hinge from your hips, not your waist. Think about keeping your chest up throughout the stroke.
Bending Knees Too Early on the Recovery
Poor timing during the return phase throws off the entire rhythm of the stroke.
- Why it is bad: Your hands hit your knees, and the stroke gets choppy and inefficient.
- Fix: Arms extend first, always. Your hands must pass your knees before you begin to bend them.
Using Too Much Resistance
Higher resistance feels harder, so it’s easy to assume it’s more effective.
- Why it is bad: High resistance makes people use bad form during strokes. It rewards strength over technique.
- Fix: Start at a damper setting of 3-5 on a Concept2 machine. Focus on clean movement, not heavy resistance.
Rushing the Recovery
Many people rush through the easier part of the stroke without realizing that it controls overall efficiency.
- Why it is bad: You never get to rest between strokes. Your timing falls apart, and your heart rate spikes unnecessarily.
- Fix: Follow the 1:2 ratio. Your drive should take 1 count. Your recovery should take 2. Slow down the way back.
Fixing these mistakes is what actually changes how rowing feels, not adding more effort or intensity. Once your sequence is clean and controlled, every stroke becomes smoother, stronger, and far less tiring.
Rowing Machine Technique for Beginners

If you are just starting out, set up the machine correctly before you even begin rowing. Secure your feet so the straps sit across the widest part of your feet, not too tight, just stable enough to stay locked in place.
Sit tall with a slight natural curve in your lower back, keeping your shoulders relaxed and down, not tense or hunched.
Start at a slow stroke rate of around 16-20 strokes per minute so you can focus on control rather than speed.
Above all, don’t chase resistance or pace early on; lock in the correct sequence first, because everything else improves once your form is solid.
Once your form feels stable, the next step is to follow a simple, structured basic rowing routine to help you apply it consistently.
Indoor vs On-Water Rowing Technique
Master the stroke on a machine first, then carry that same sequence onto the water without changing the fundamentals. The environment shifts, but the mechanics don’t.
| Aspect | Indoor Rowing (Machine) | On-Water Rowing |
|---|---|---|
| Stroke Mechanics | Same 4-phase stroke (catch, drive, finish, recovery) | Same 4-phase stroke |
| Movement Sequence | Legs → core → arms | Legs → core → arms |
| Balance | No balance required | Constant balance and boat control are needed |
| Resistance | Consistent and controlled | Varies with water, wind, and conditions |
| Feedback | Instant data (pace, stroke rate, power) | Limited real-time feedback |
| Learning Curve | Easier to learn and refine the technique | Harder due to added coordination |
| Focus | Technique and efficiency | Technique + balance + timing |
Once you understand these differences, it also helps to understand the two primary rowing methods and how each one changes the way technique is applied on the water.
What This Actually Means:
- If your technique is bad on a machine, it will fall apart even faster on water
- Machines are better for learning and fixing form
- On-water rowing exposes weaknesses you can hide indoors
Reality Check: Most people think they can “figure it out” on water. That’s backward. You build technique on the machine first, then transfer it to water, not the other way around.
Drills to Improve Your Rowing Technique Fast
These drills are what coaches use. They isolate parts of the stroke so you can feel what each phase should be like.
- Legs-only drill: Row using only your legs. Keep arms straight and back still. This teaches you where the power really comes from.
- Arms-only drill: Keep legs straight and use only your arms. This helps you feel the finish position clearly.
- Pause drill: Pause for 2 seconds at the catch or finish position. This forces you to stop rushing and lock in your positions.
- Slow-rate rowing: Row at 14 to 16 SPM and focus on every phase. Slow rowing exposes every mistake quickly.
Do these drills slowly and purposely; speed will only hide mistakes, not fix them. Once each phase feels controlled on its own, putting the full stroke together becomes far more efficient and natural.
Rowing Tips for Maximum Efficiency
Small adjustments like these add up significantly over time and directly improve both efficiency and endurance. Keep your grip firm but relaxed, as squeezing the handle too tightly can fatigue your forearms and disrupt your timing.
Match your breathing to the movement: exhale on the drive and inhale on the recovery to maintain a steady rhythm.
Focus on consistency rather than power spikes, because controlled, flowing strokes are far more effective than explosive ones.
If your movement feels jerky or you hear the machine slamming, your form has broken down. Smooth, controlled motion is always the goal.
Conclusion
Proper rowing technique comes down to one simple rule: legs first, then core, then arms. When you follow the right sequence and move through all four stroke phases correctly, everything clicks.
You get more power, less fatigue, and zero back pain. Start slow, focus on clean movement, and build from there. Speed and resistance come later. Thousands of people row every day and never fix their form.
Now you know better. Get on the machine, follow the steps, and feel the difference from your very first stroke.
Frequently Asked Questions
Why Does My Lower Back Hurt After Rowing?
Lower back pain usually comes from rounding your spine or leaning too far back during the stroke. In most cases, fixing posture and sequencing solves the problem quickly.
What is the Correct Hand Position on a Rowing Machine?
Your hands should stay relaxed with wrists flat and elbows close to the body during the pull. Gripping too tightly or bending the wrists creates unnecessary strain and reduces control.
How Often Should Beginners Row Each Week?
Most beginners do well with 3 to 4 rowing sessions per week while focusing on technique first. Daily high-intensity rowing usually leads to fatigue and poor form.